Welcome to the streamlined integration of PipeOps with GitHub. This guide will walk you through the steps to authenticate PipeOps with your GitHub account, ensuring a seamless connection for enhanced collaboration for efficient cloud deployments.
Let's simplify your development process
Prerequisites:
Begin by creating your GitHub Account, if you haven't already
How to Configure Your GitHub Public Email
Configure your GitHub public email for a seamless authentication process. This step is essential for the authentication process and account creation. PipeOps uses this email to create your account for future authentication.
GitHub typically sets the email to private by default, but it's essential to adjust this setting to ensure a smooth and successful integration with PipeOps. By making your email public, you facilitate a more transparent and efficient collaboration between both platforms.
Now let's follow the steps below to ensure your GitHub email is set to public, allowing PipeOps to authenticate and create your account seamlessly.
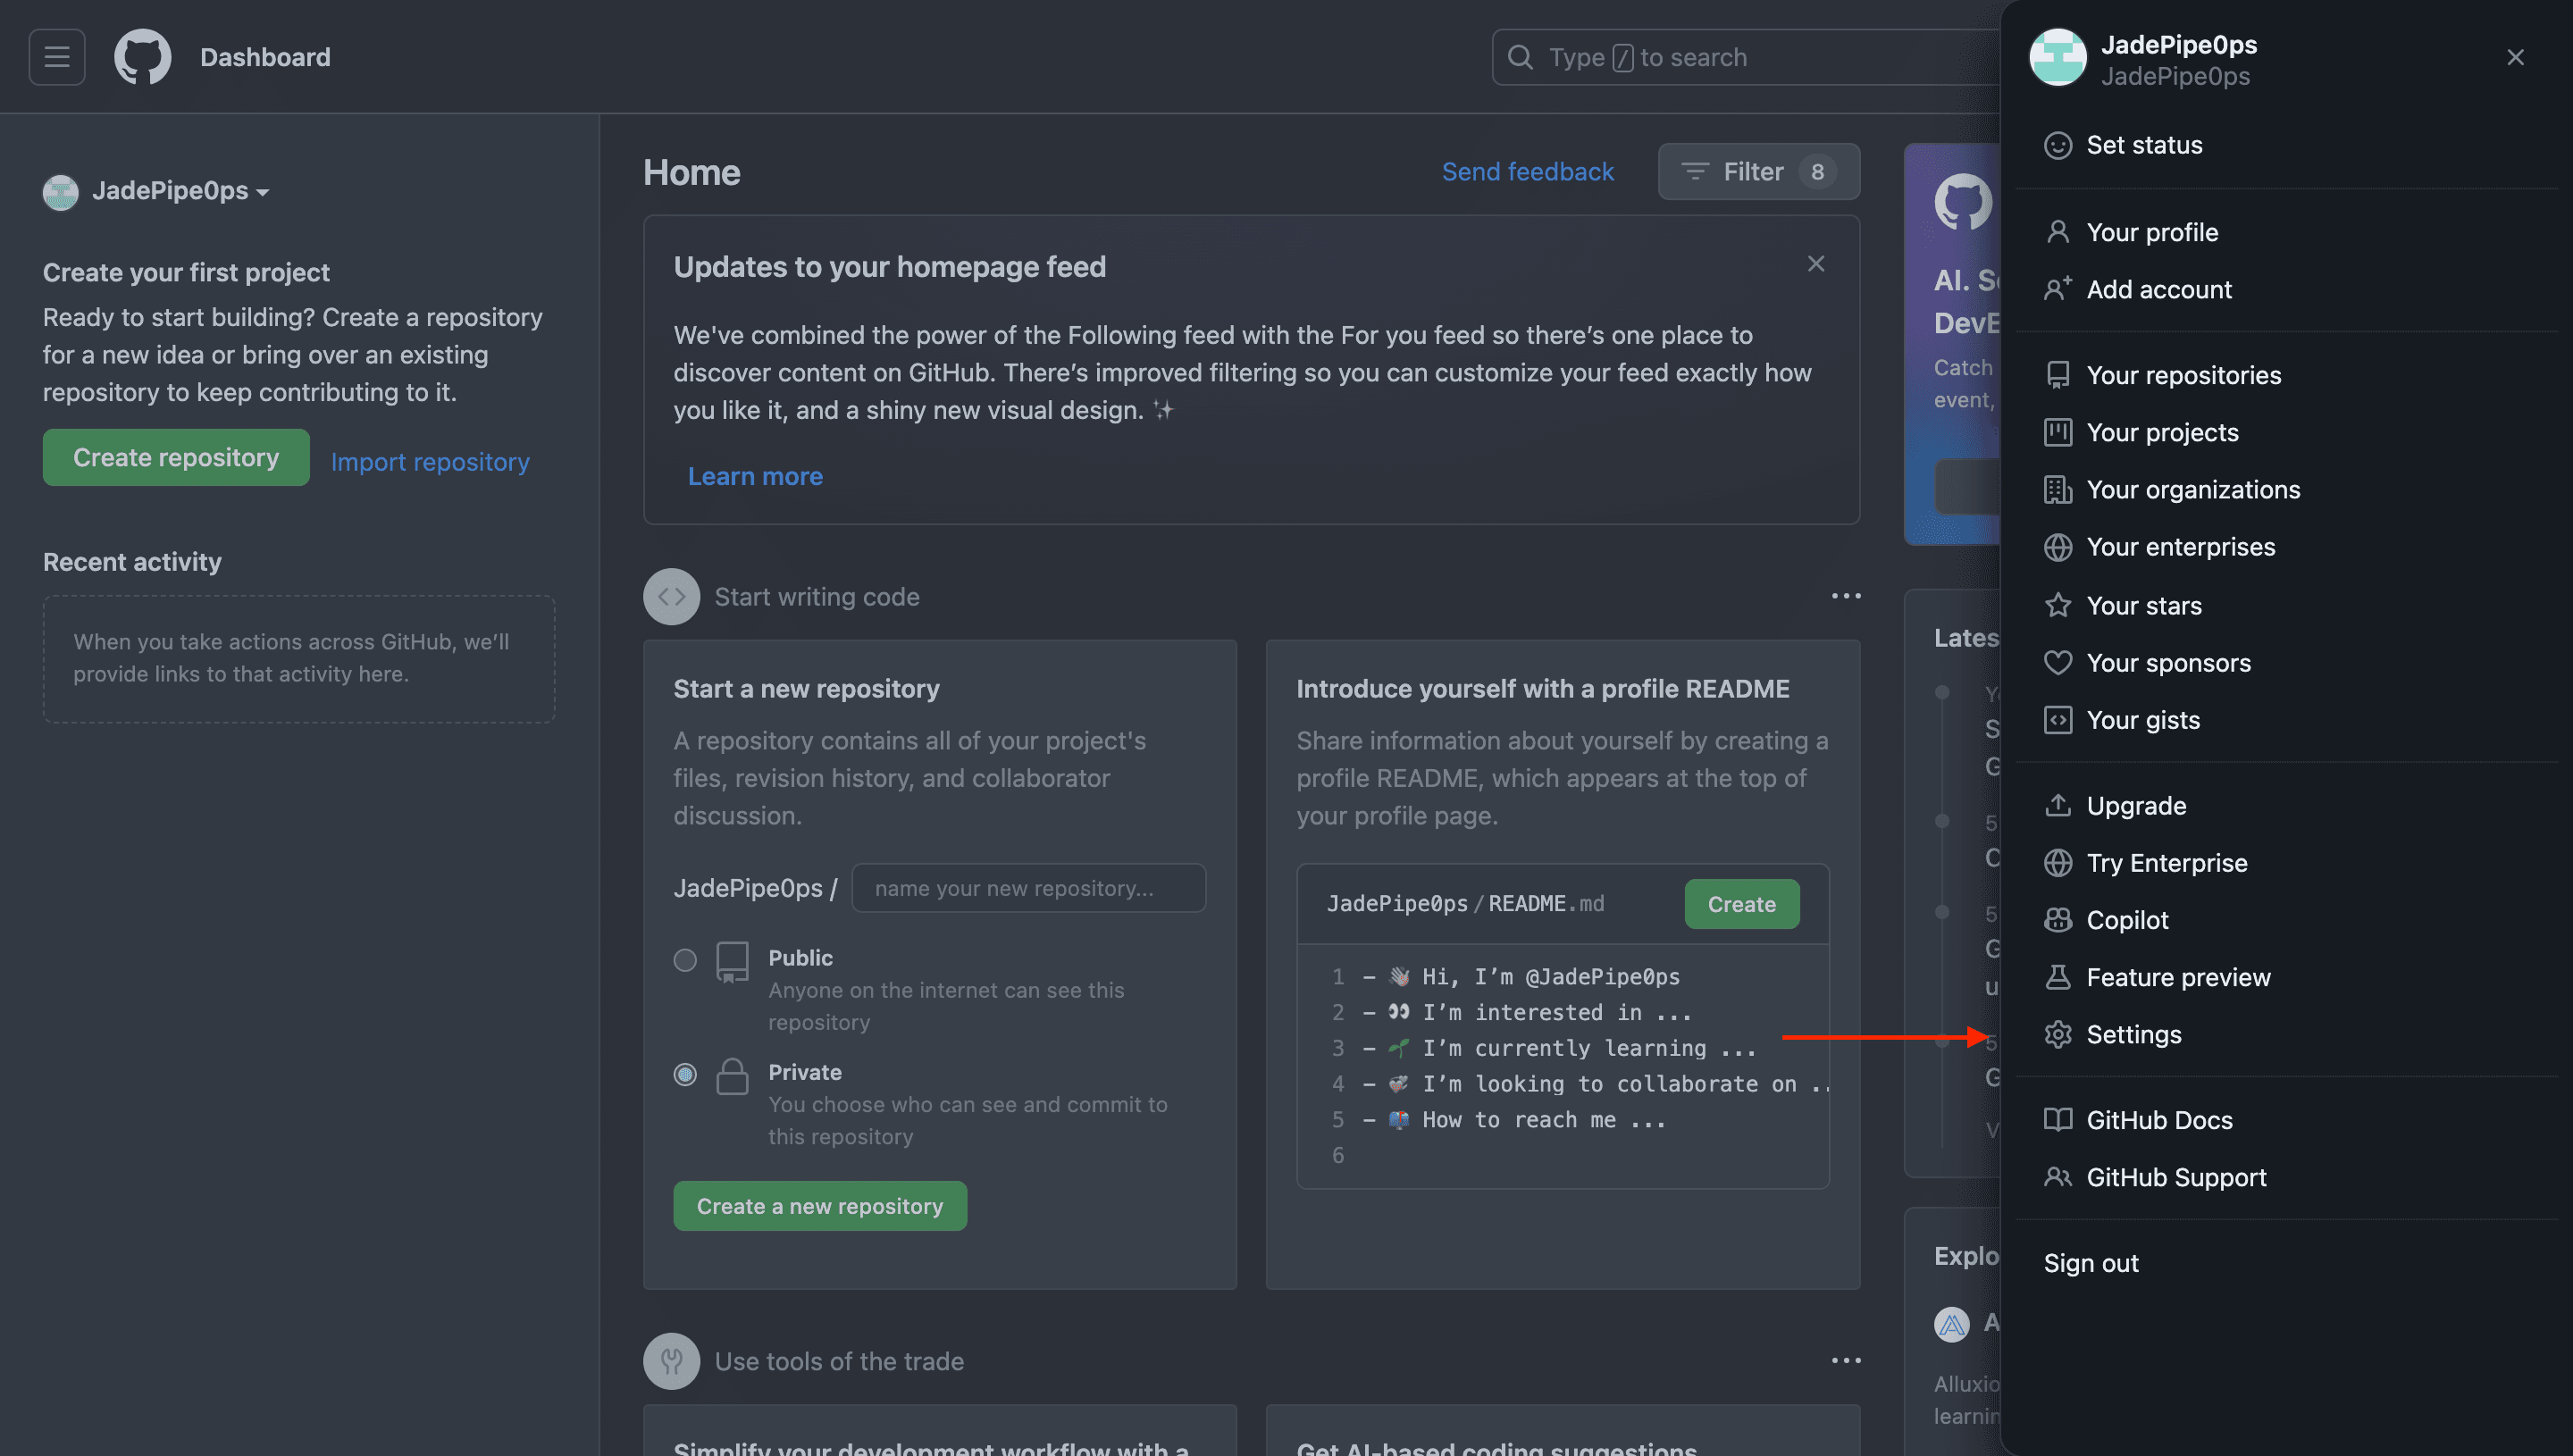
First Step
- The first step is to navigate to your settings
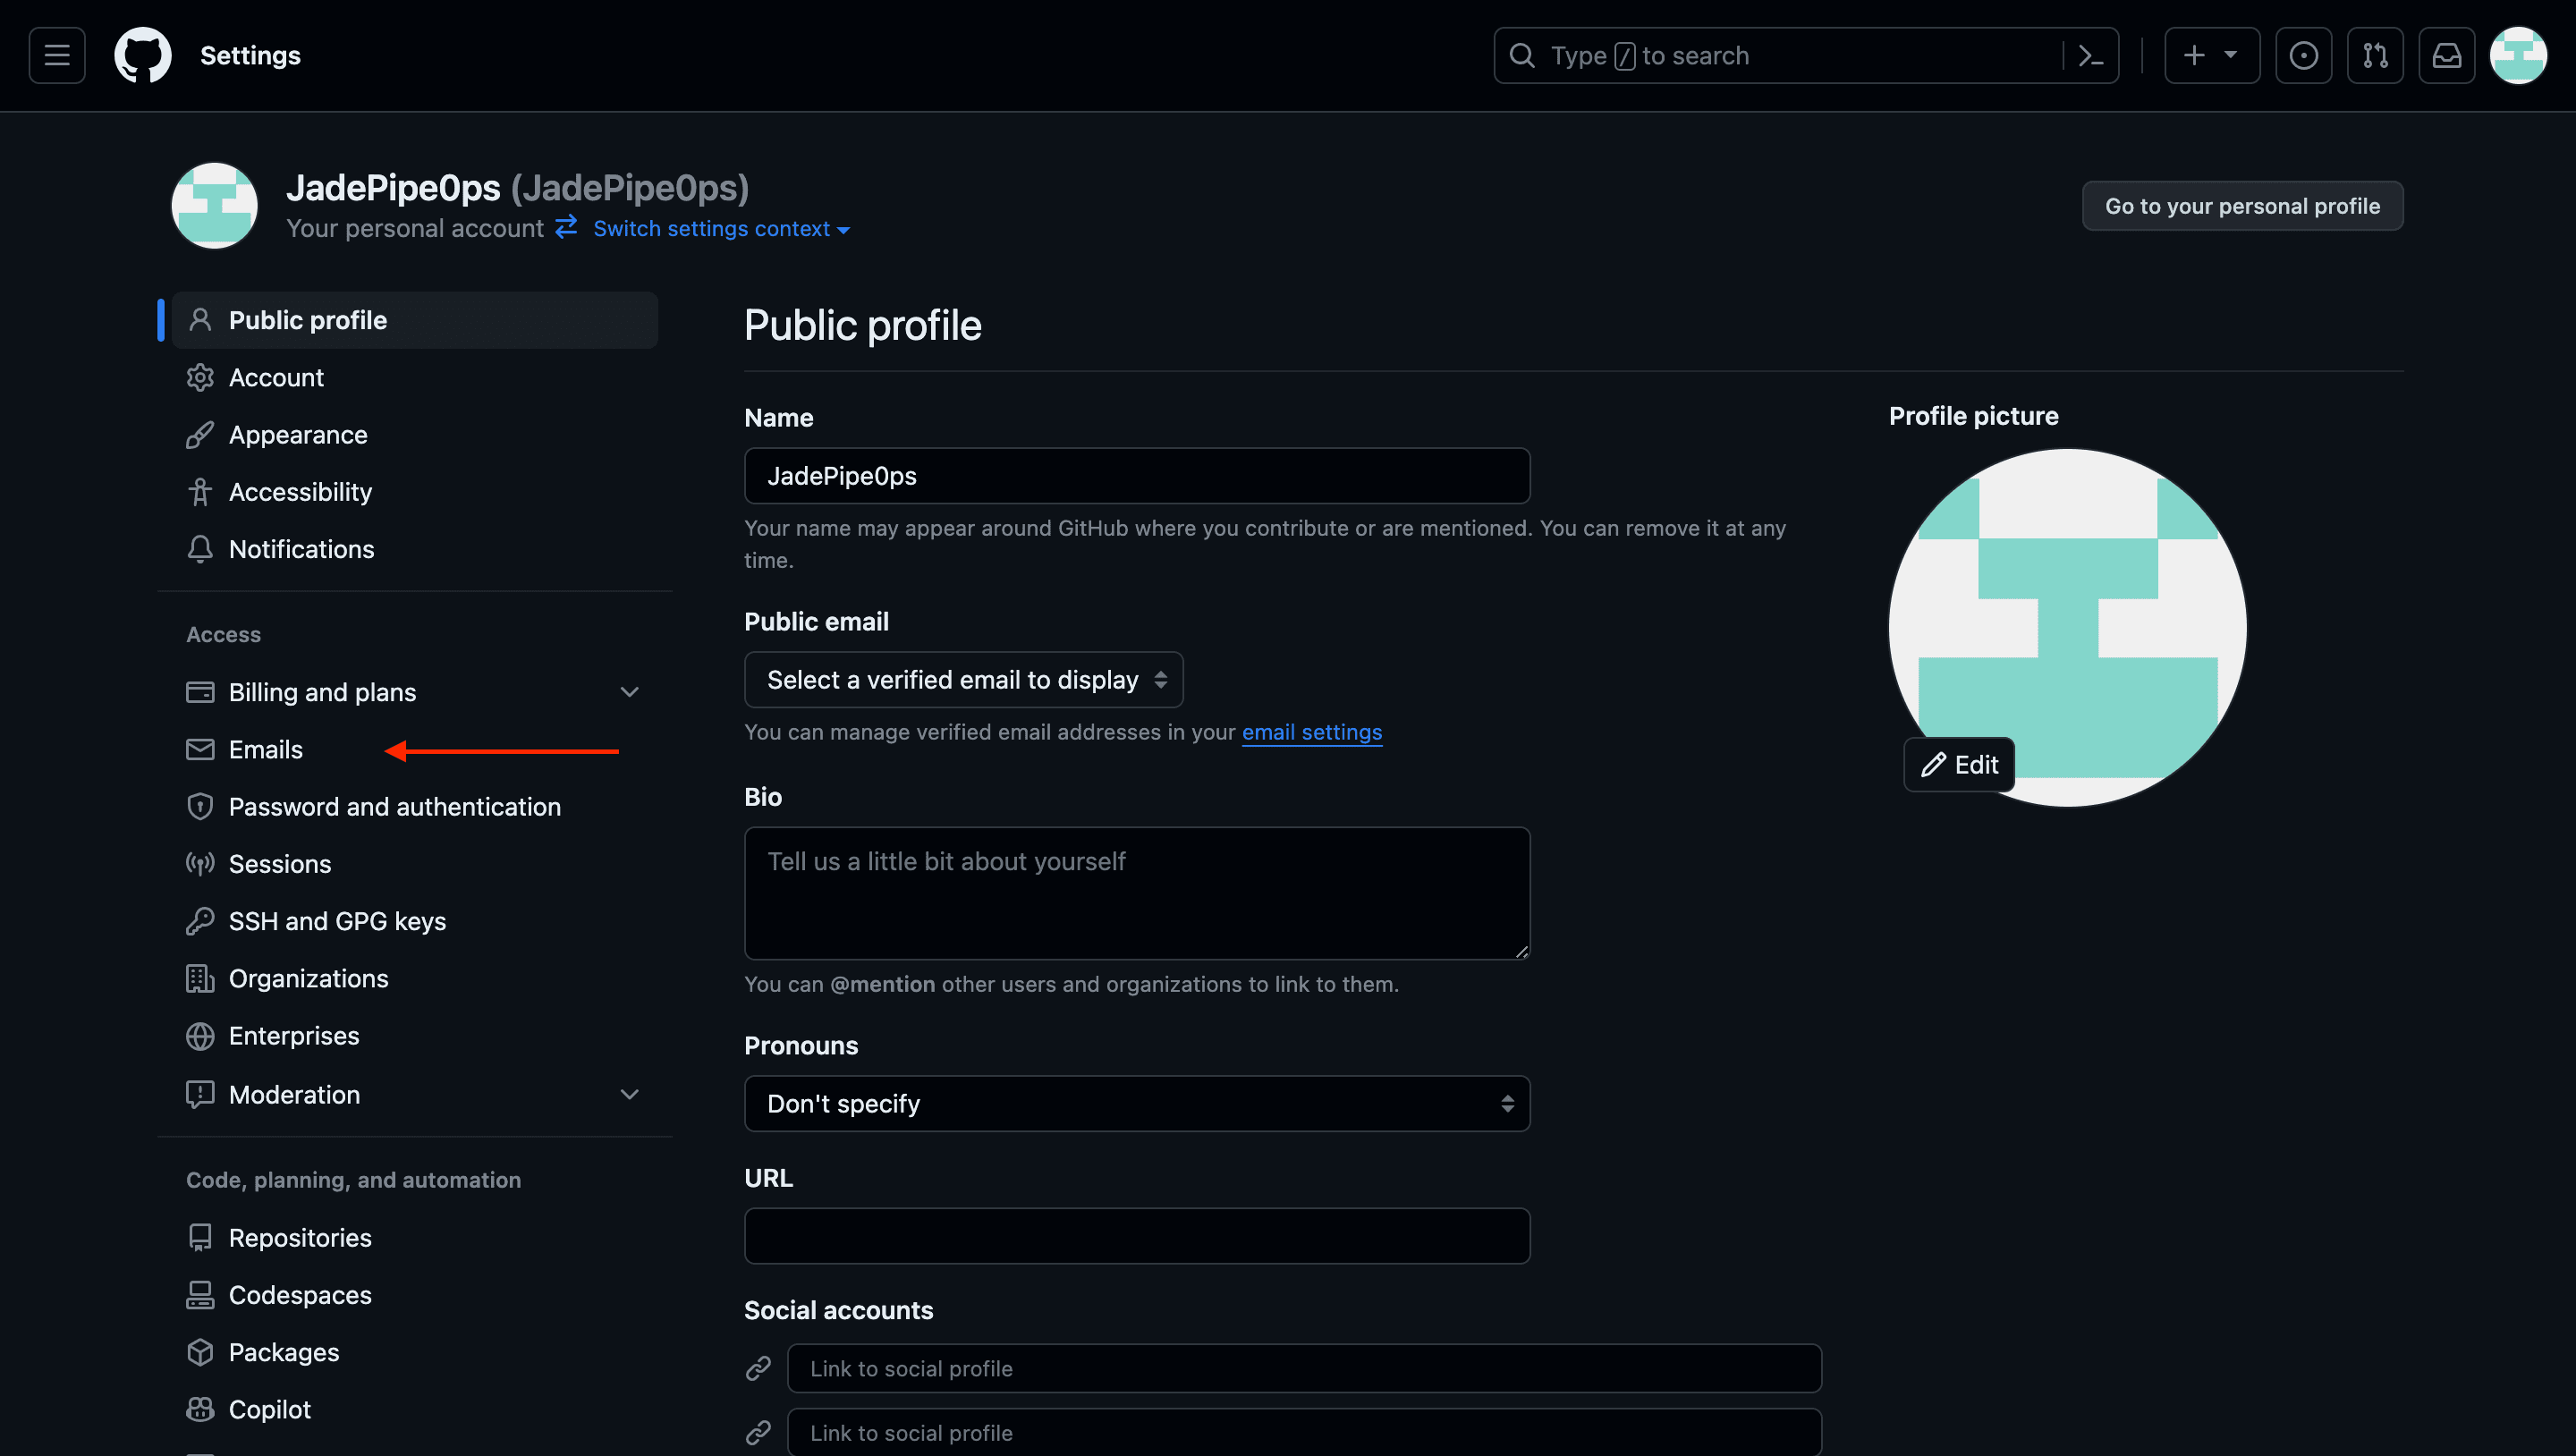
- Select the emails under the Access button
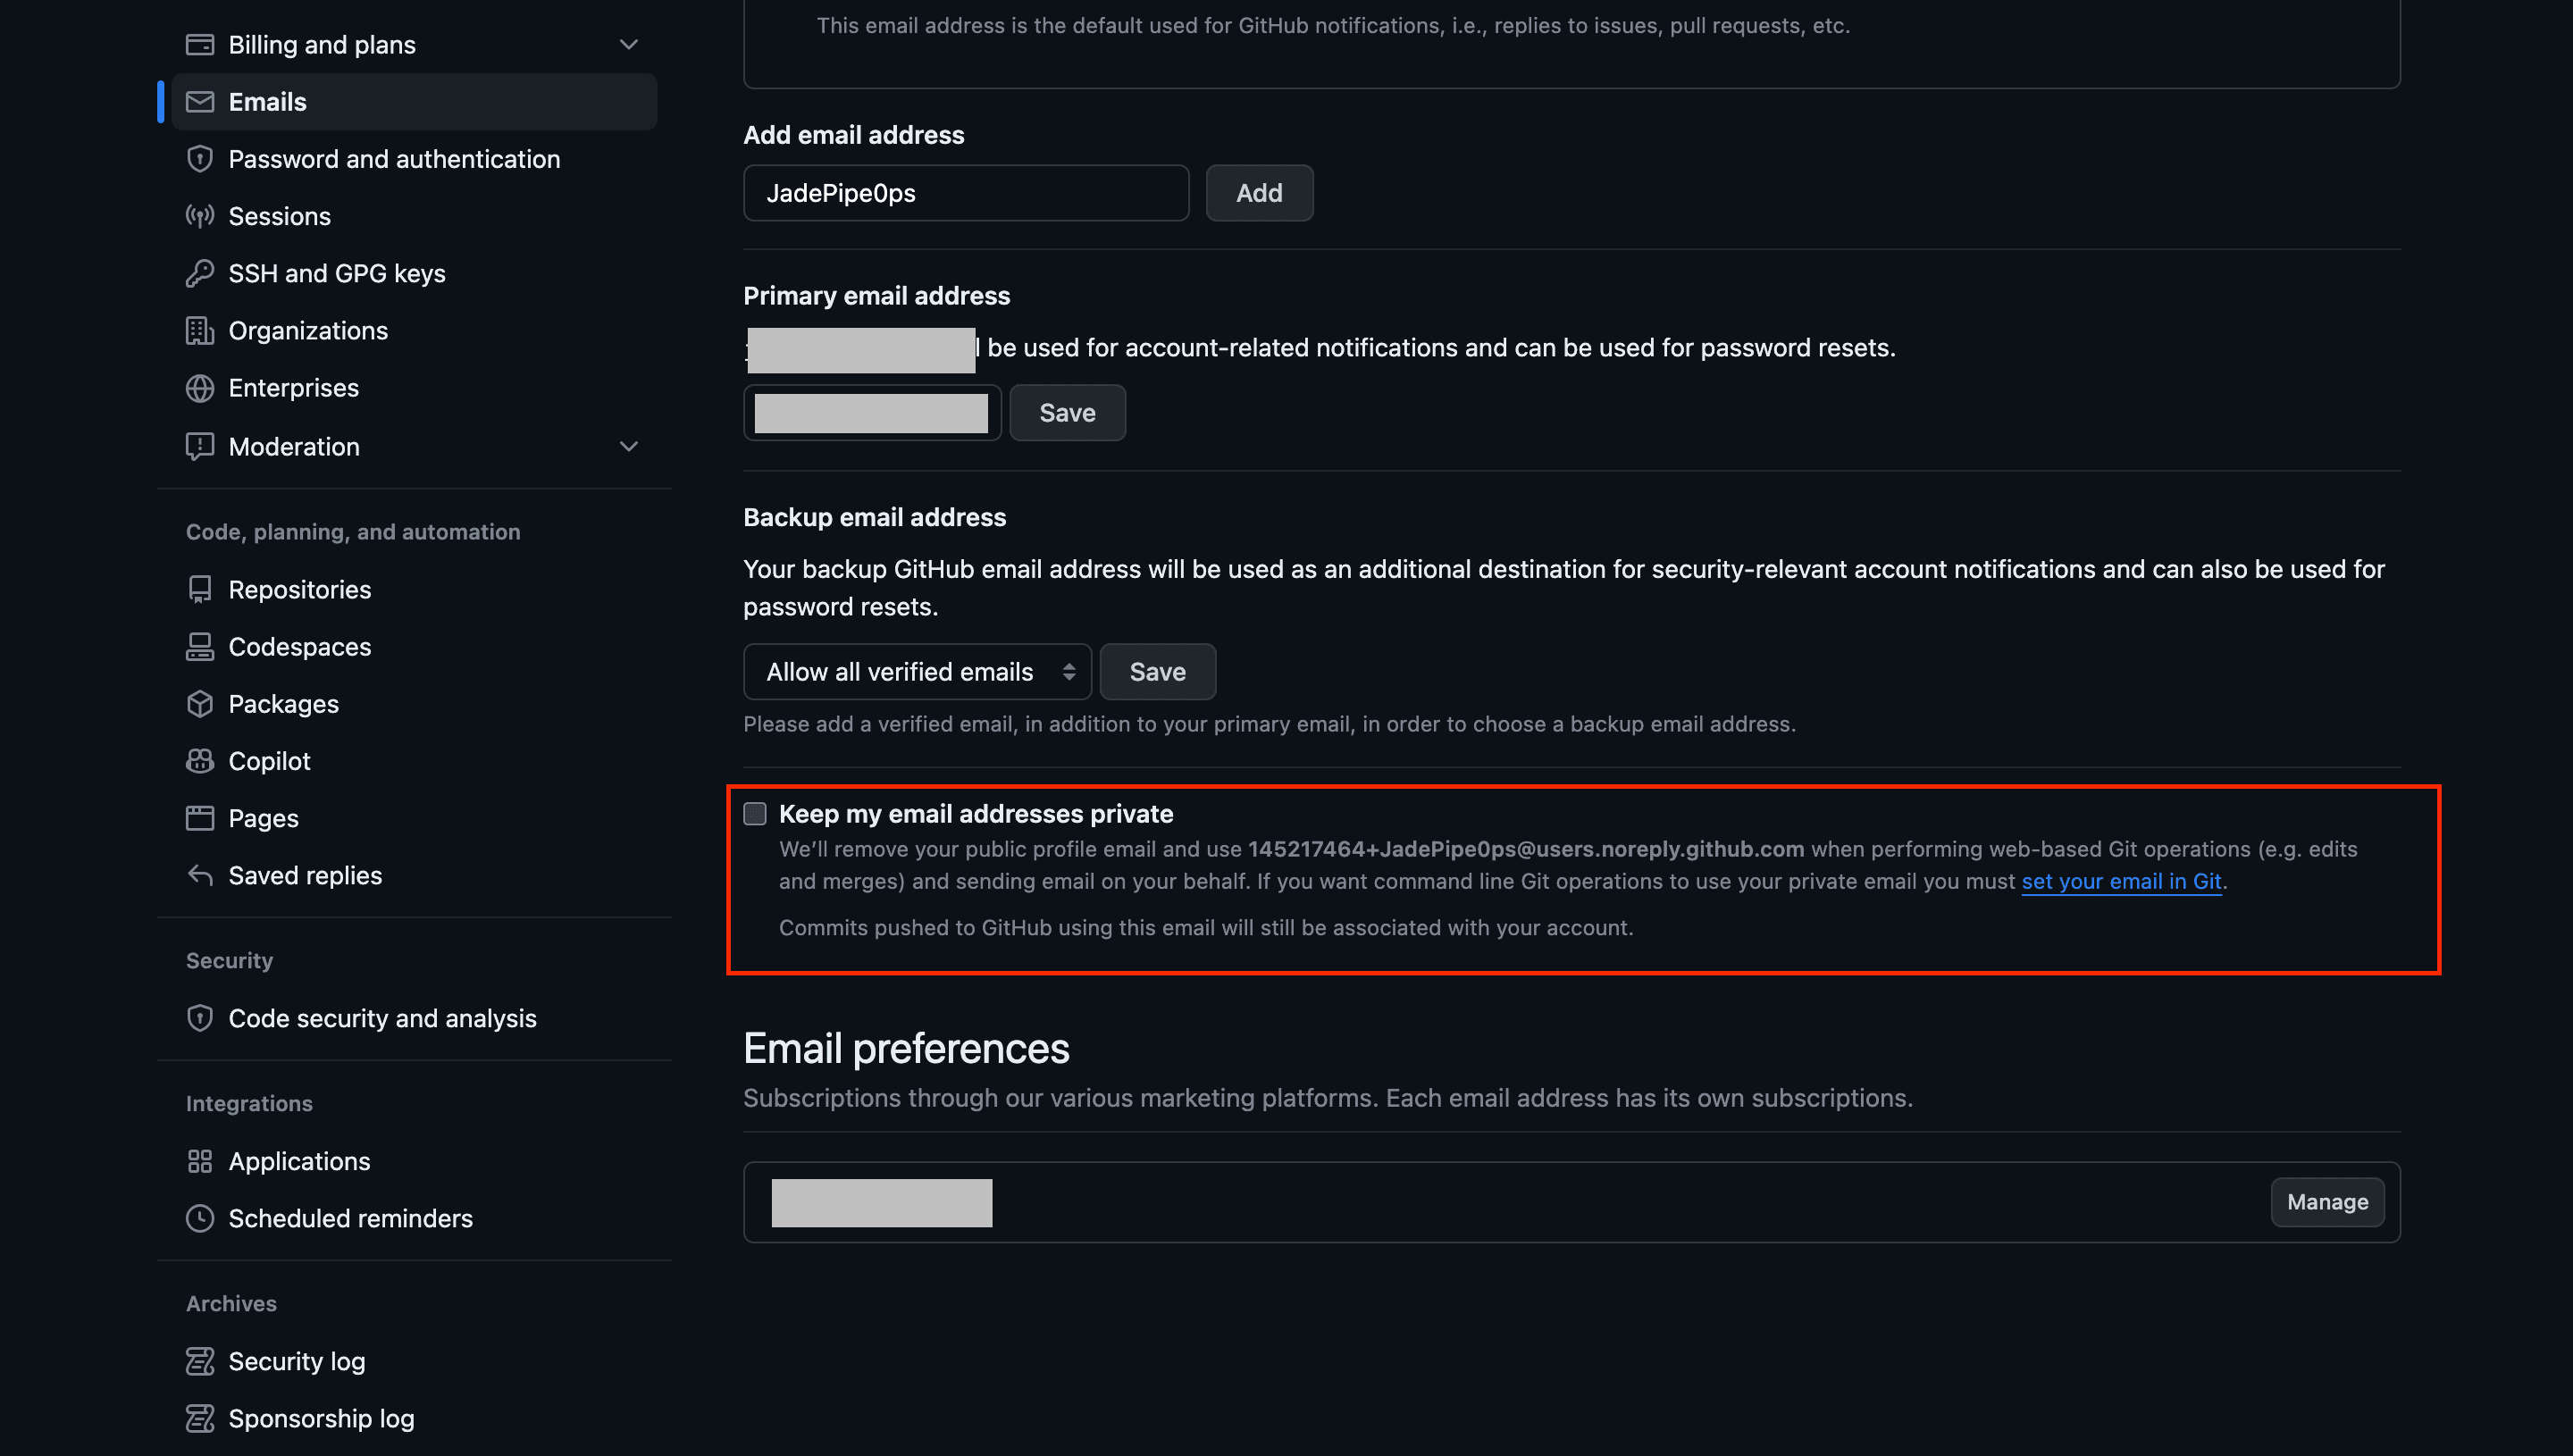
- Scroll down and uncheck the keep my email addresses private to inactive. This will allow your verified email(s) to be Public.
Second step:
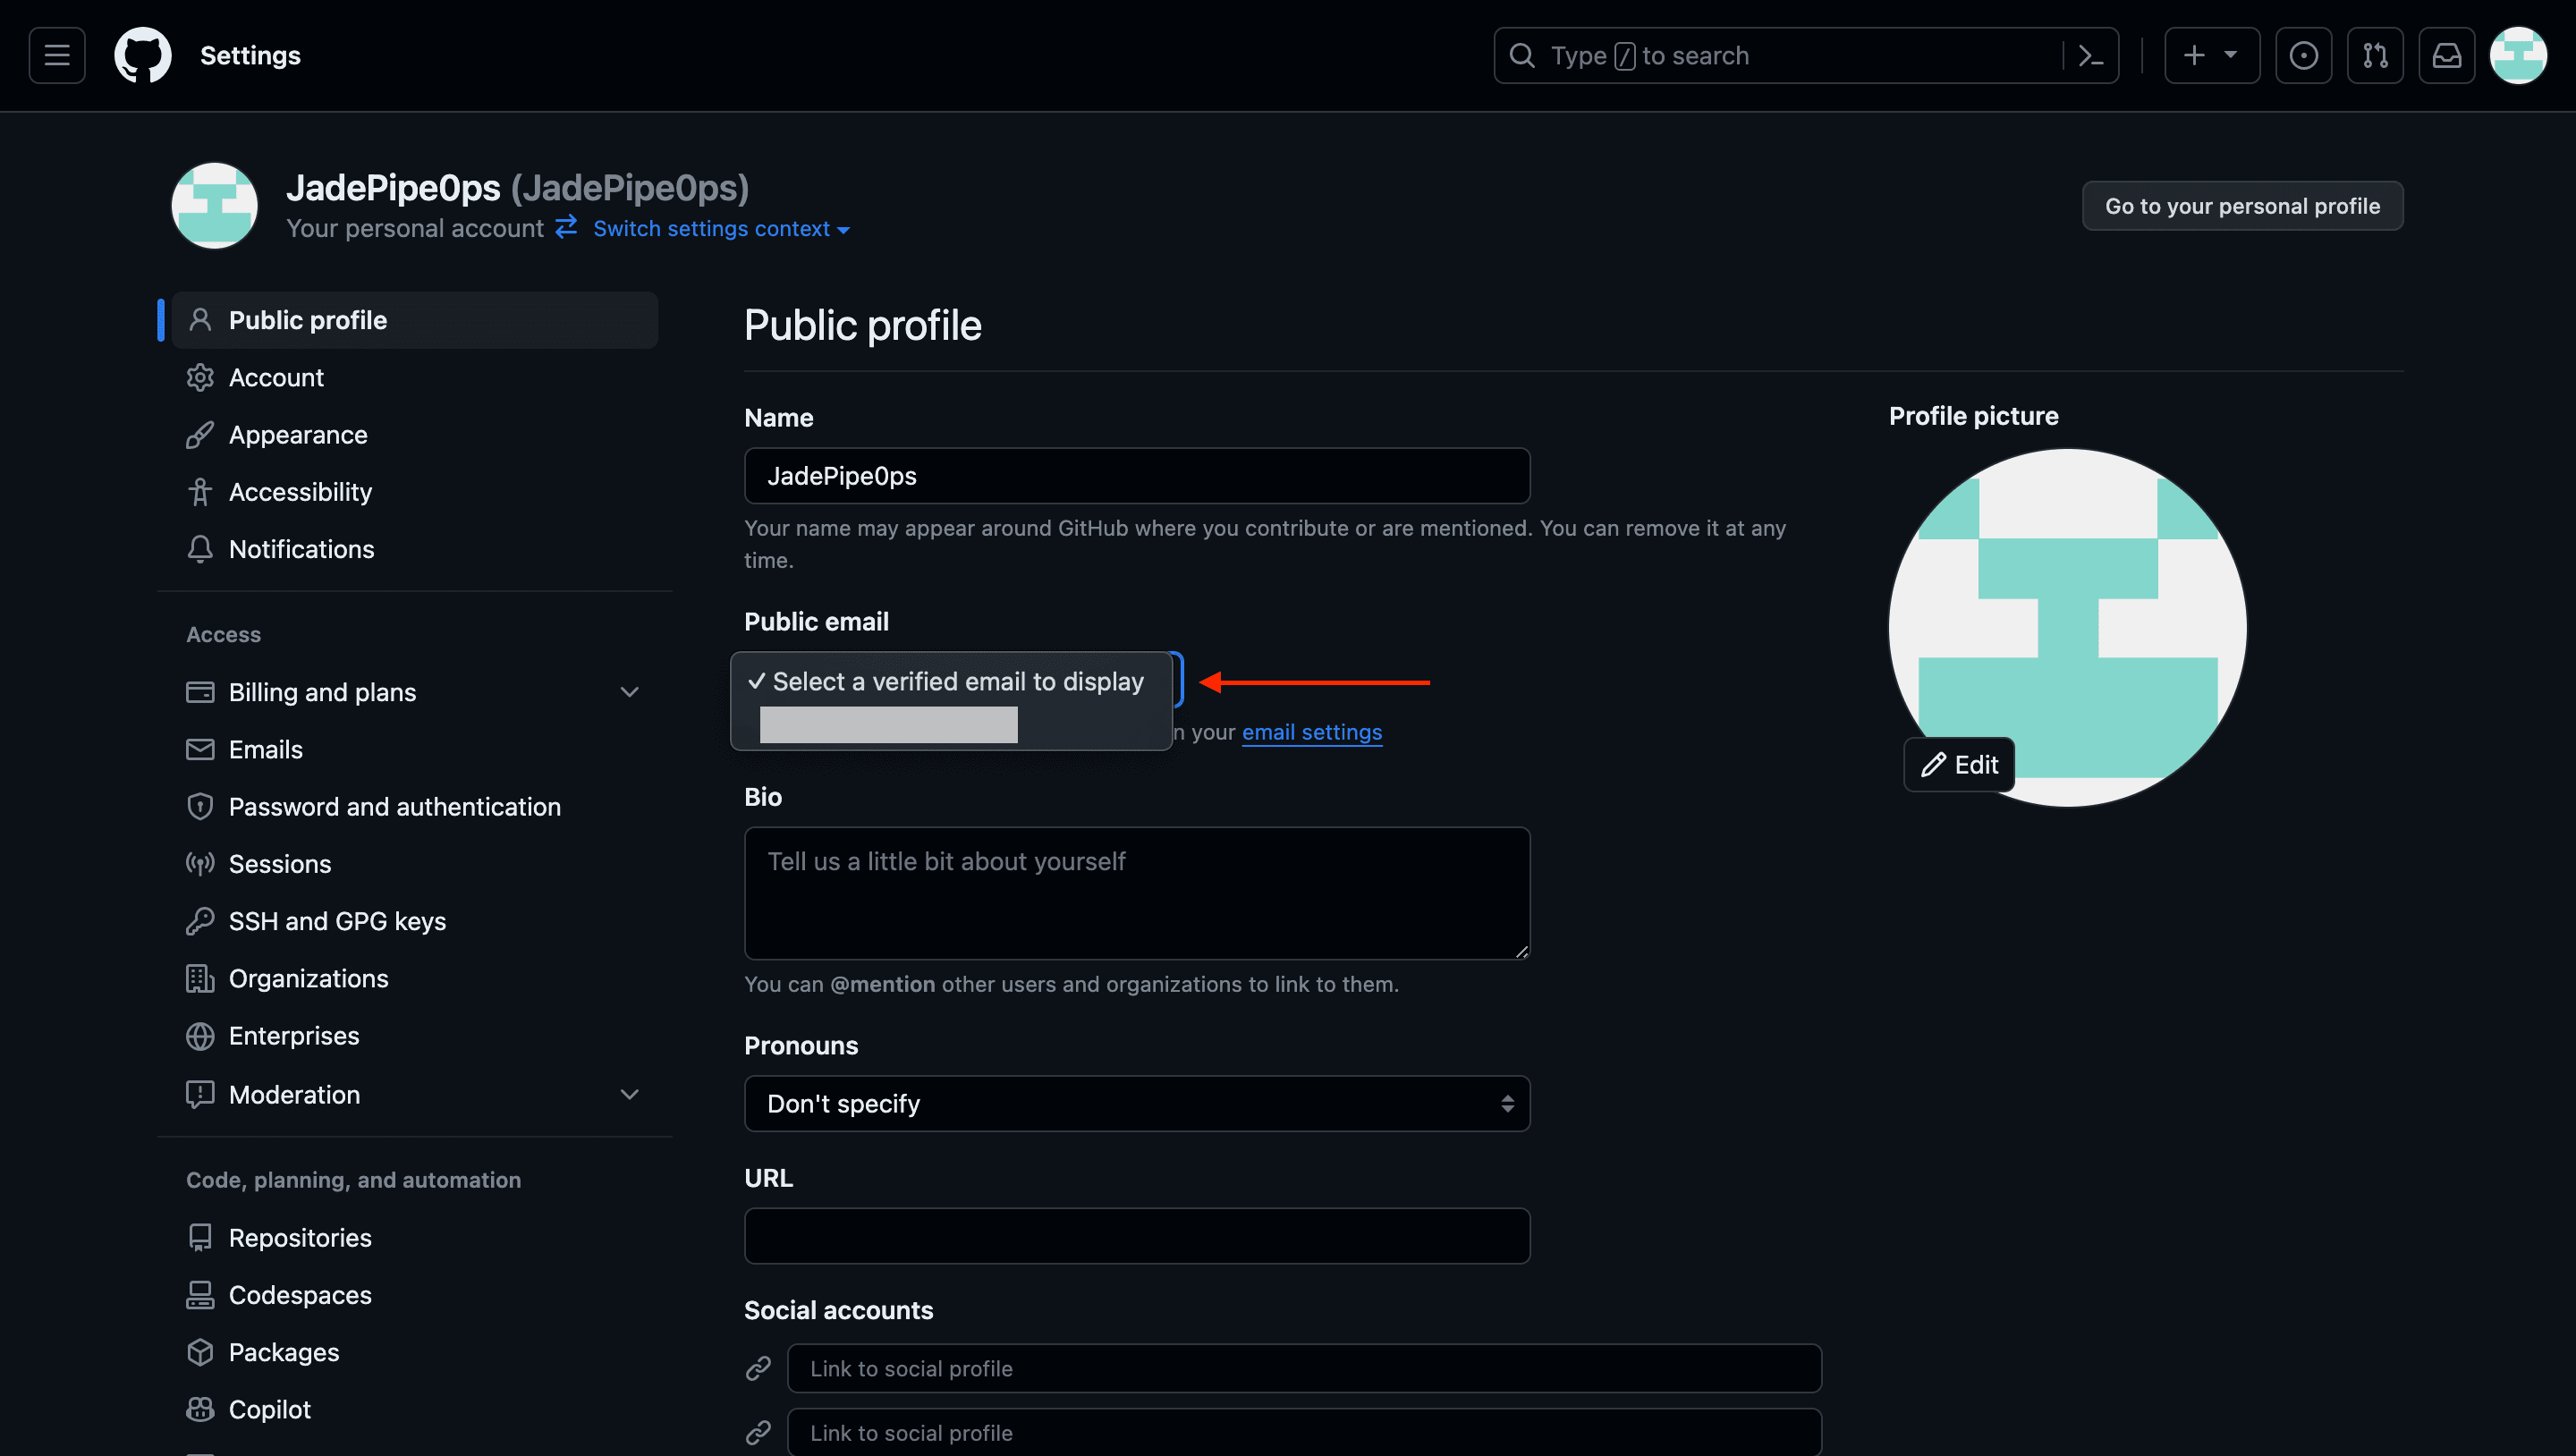
- Next, Navigate to the public profile, still in the settings.
- On the Public Profile page, Select the verified email from the Public Email field list(s)
-
Click on the update button below to update the changes.
-
Allow some minutes for GitHub to sync this change to your settings.
You have successfully updated your public email. Next let's authenticate with PipeOps
Authentication from PipeOps
Before authenticating with GitHub from the PipeOps Dashboard, let's confirm the following checkpoints below, you can refer to the above steps on how to configure them.

-
Active GitHub account
-
GitHub Public Email Configured.
Once the above checkpoints are met, Authentication with PipeOps is a straightforward next step.
-
Simply navigate to the PipeOps dashboard, where you'll find intuitive options to link different version control providers, in this case, we are using the GitHub option.
-
Follow the prompts to connect securely with PipeOps and your GitHub account.
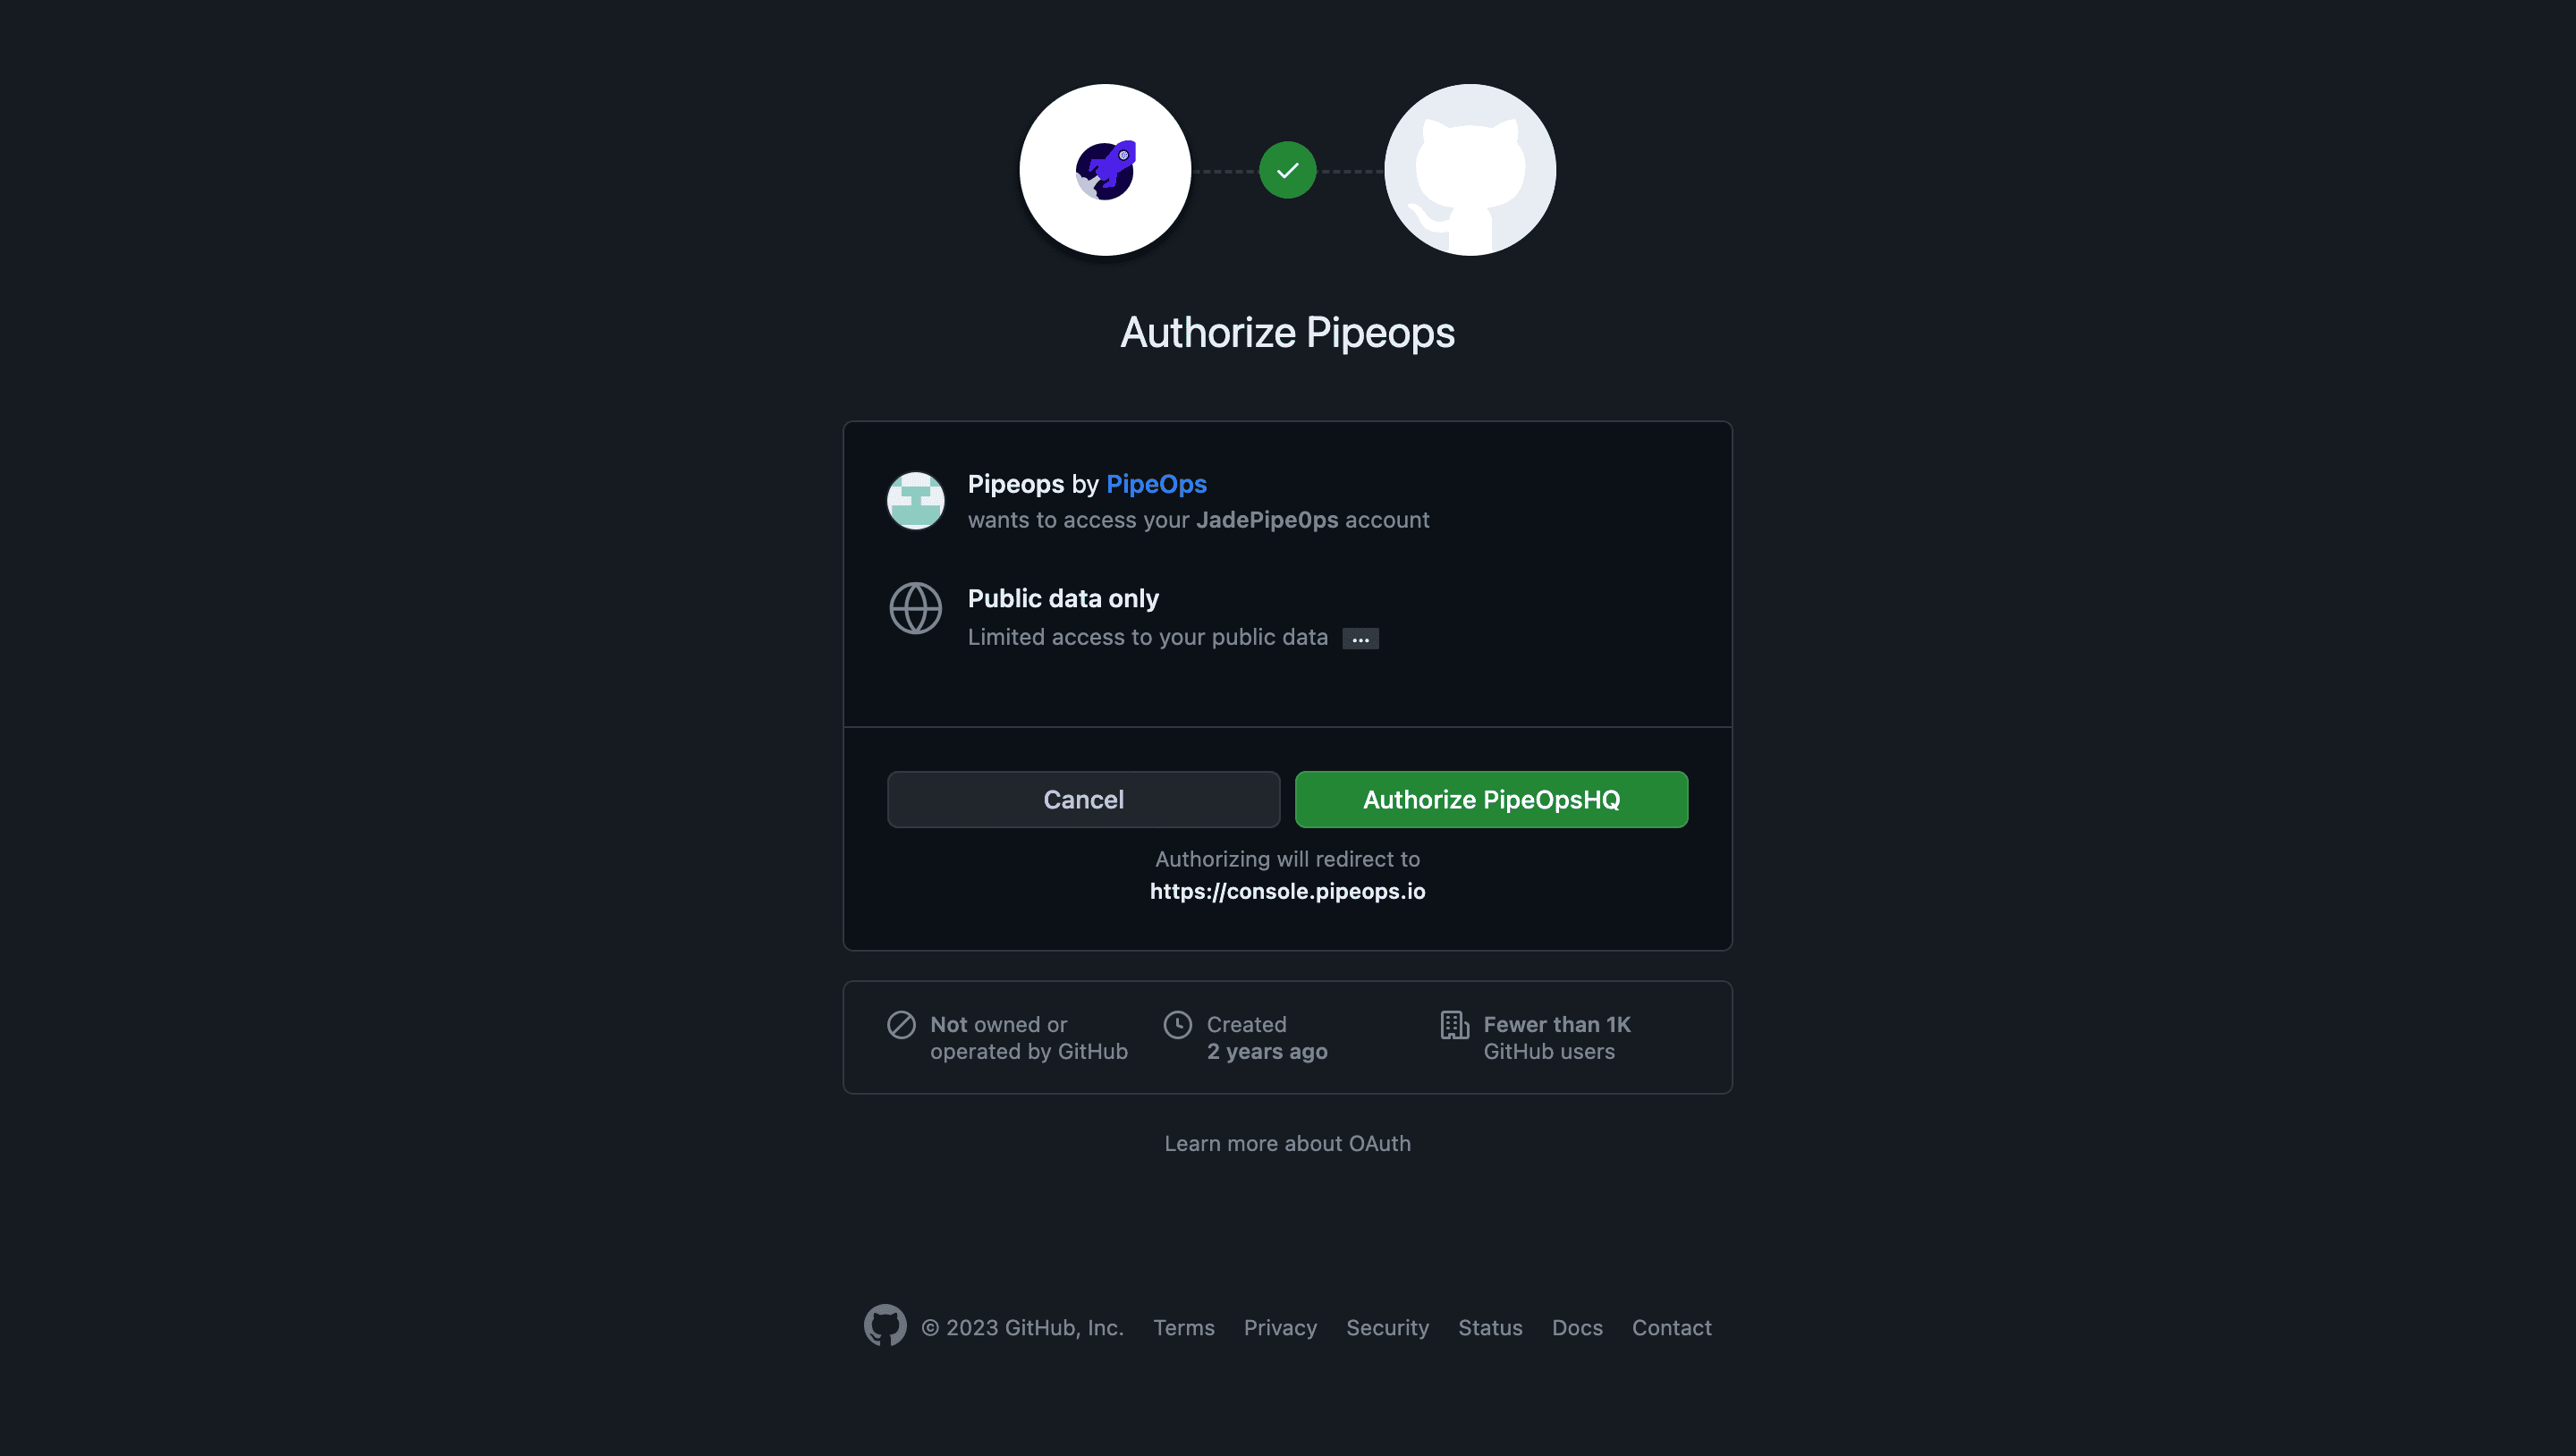
This user-friendly authentication process ensures you can quickly integrate PipeOps into your workflow, making cloud management a smooth and efficient experience.
- On successful authentication, you are automatically redirected to your project dashboard.

You have successfully authenticated your GitHub with PipeOps
How to Grant PipeOps Access to Private Repositories
After integrating your GitHub account with PipeOps, only public repositories are accessible by default. Follow these steps to grant PipeOps access to your private repositories:
-
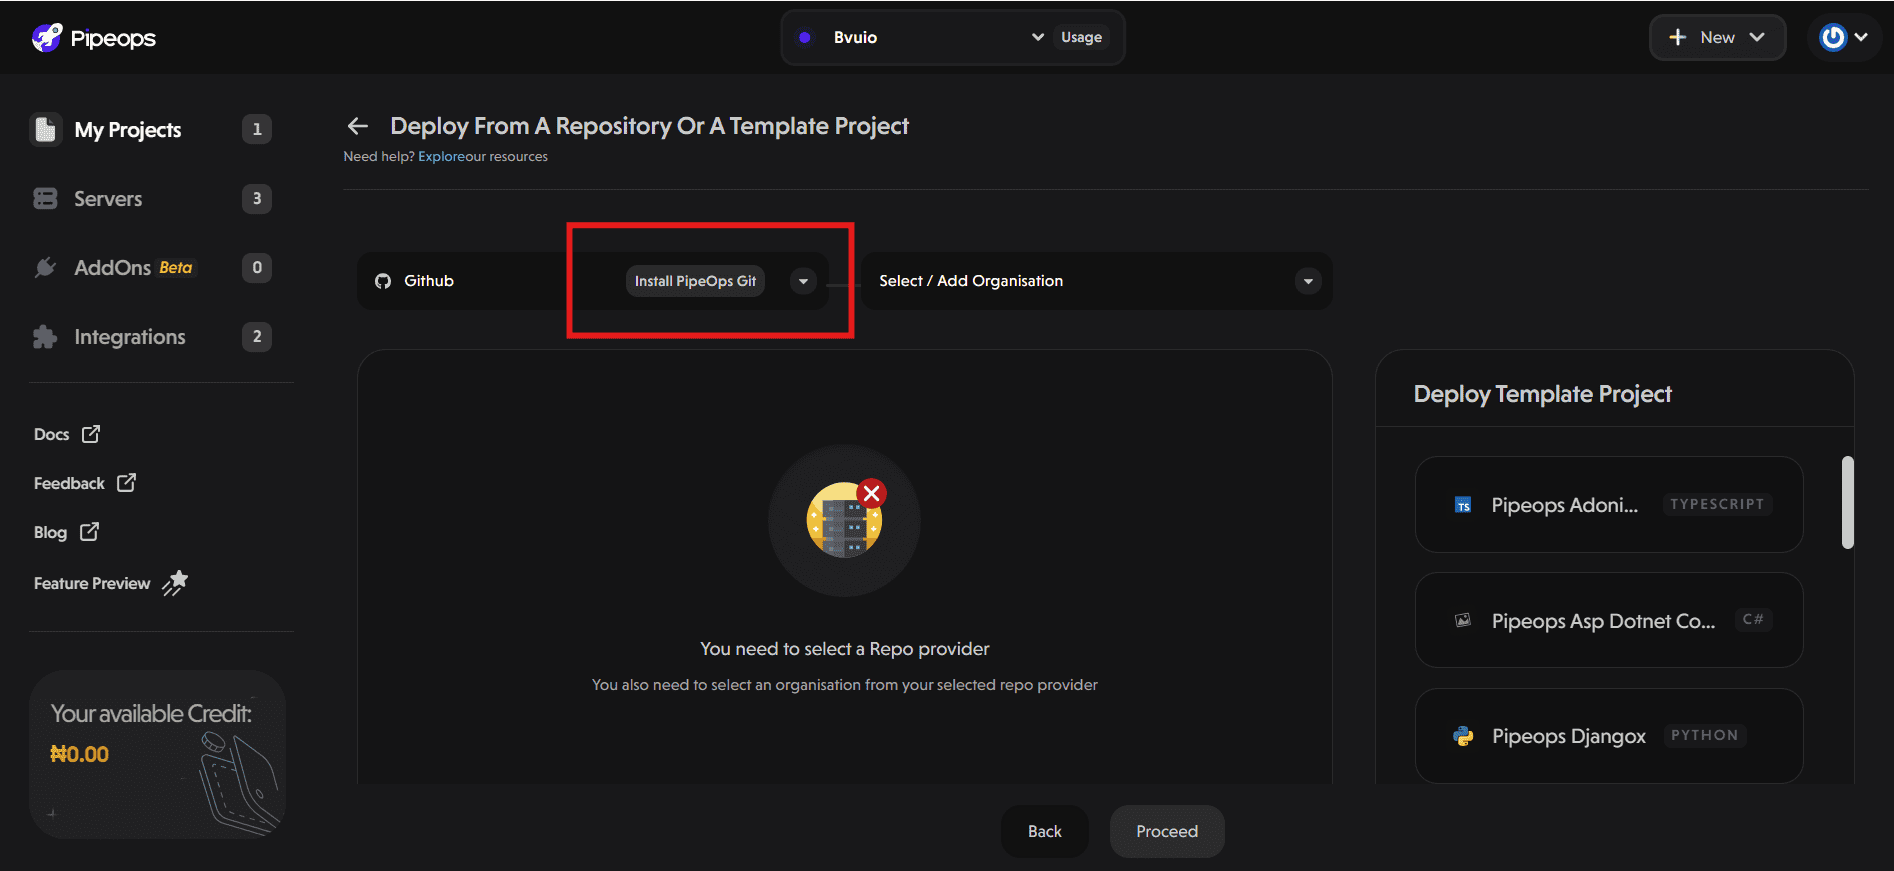
Navigate to your Project dashboard and select GitHub as your repository provider.
-
Click on Install PipeOps Git
- A modal will appear, outlining what installing the PipeOps Git App will do.
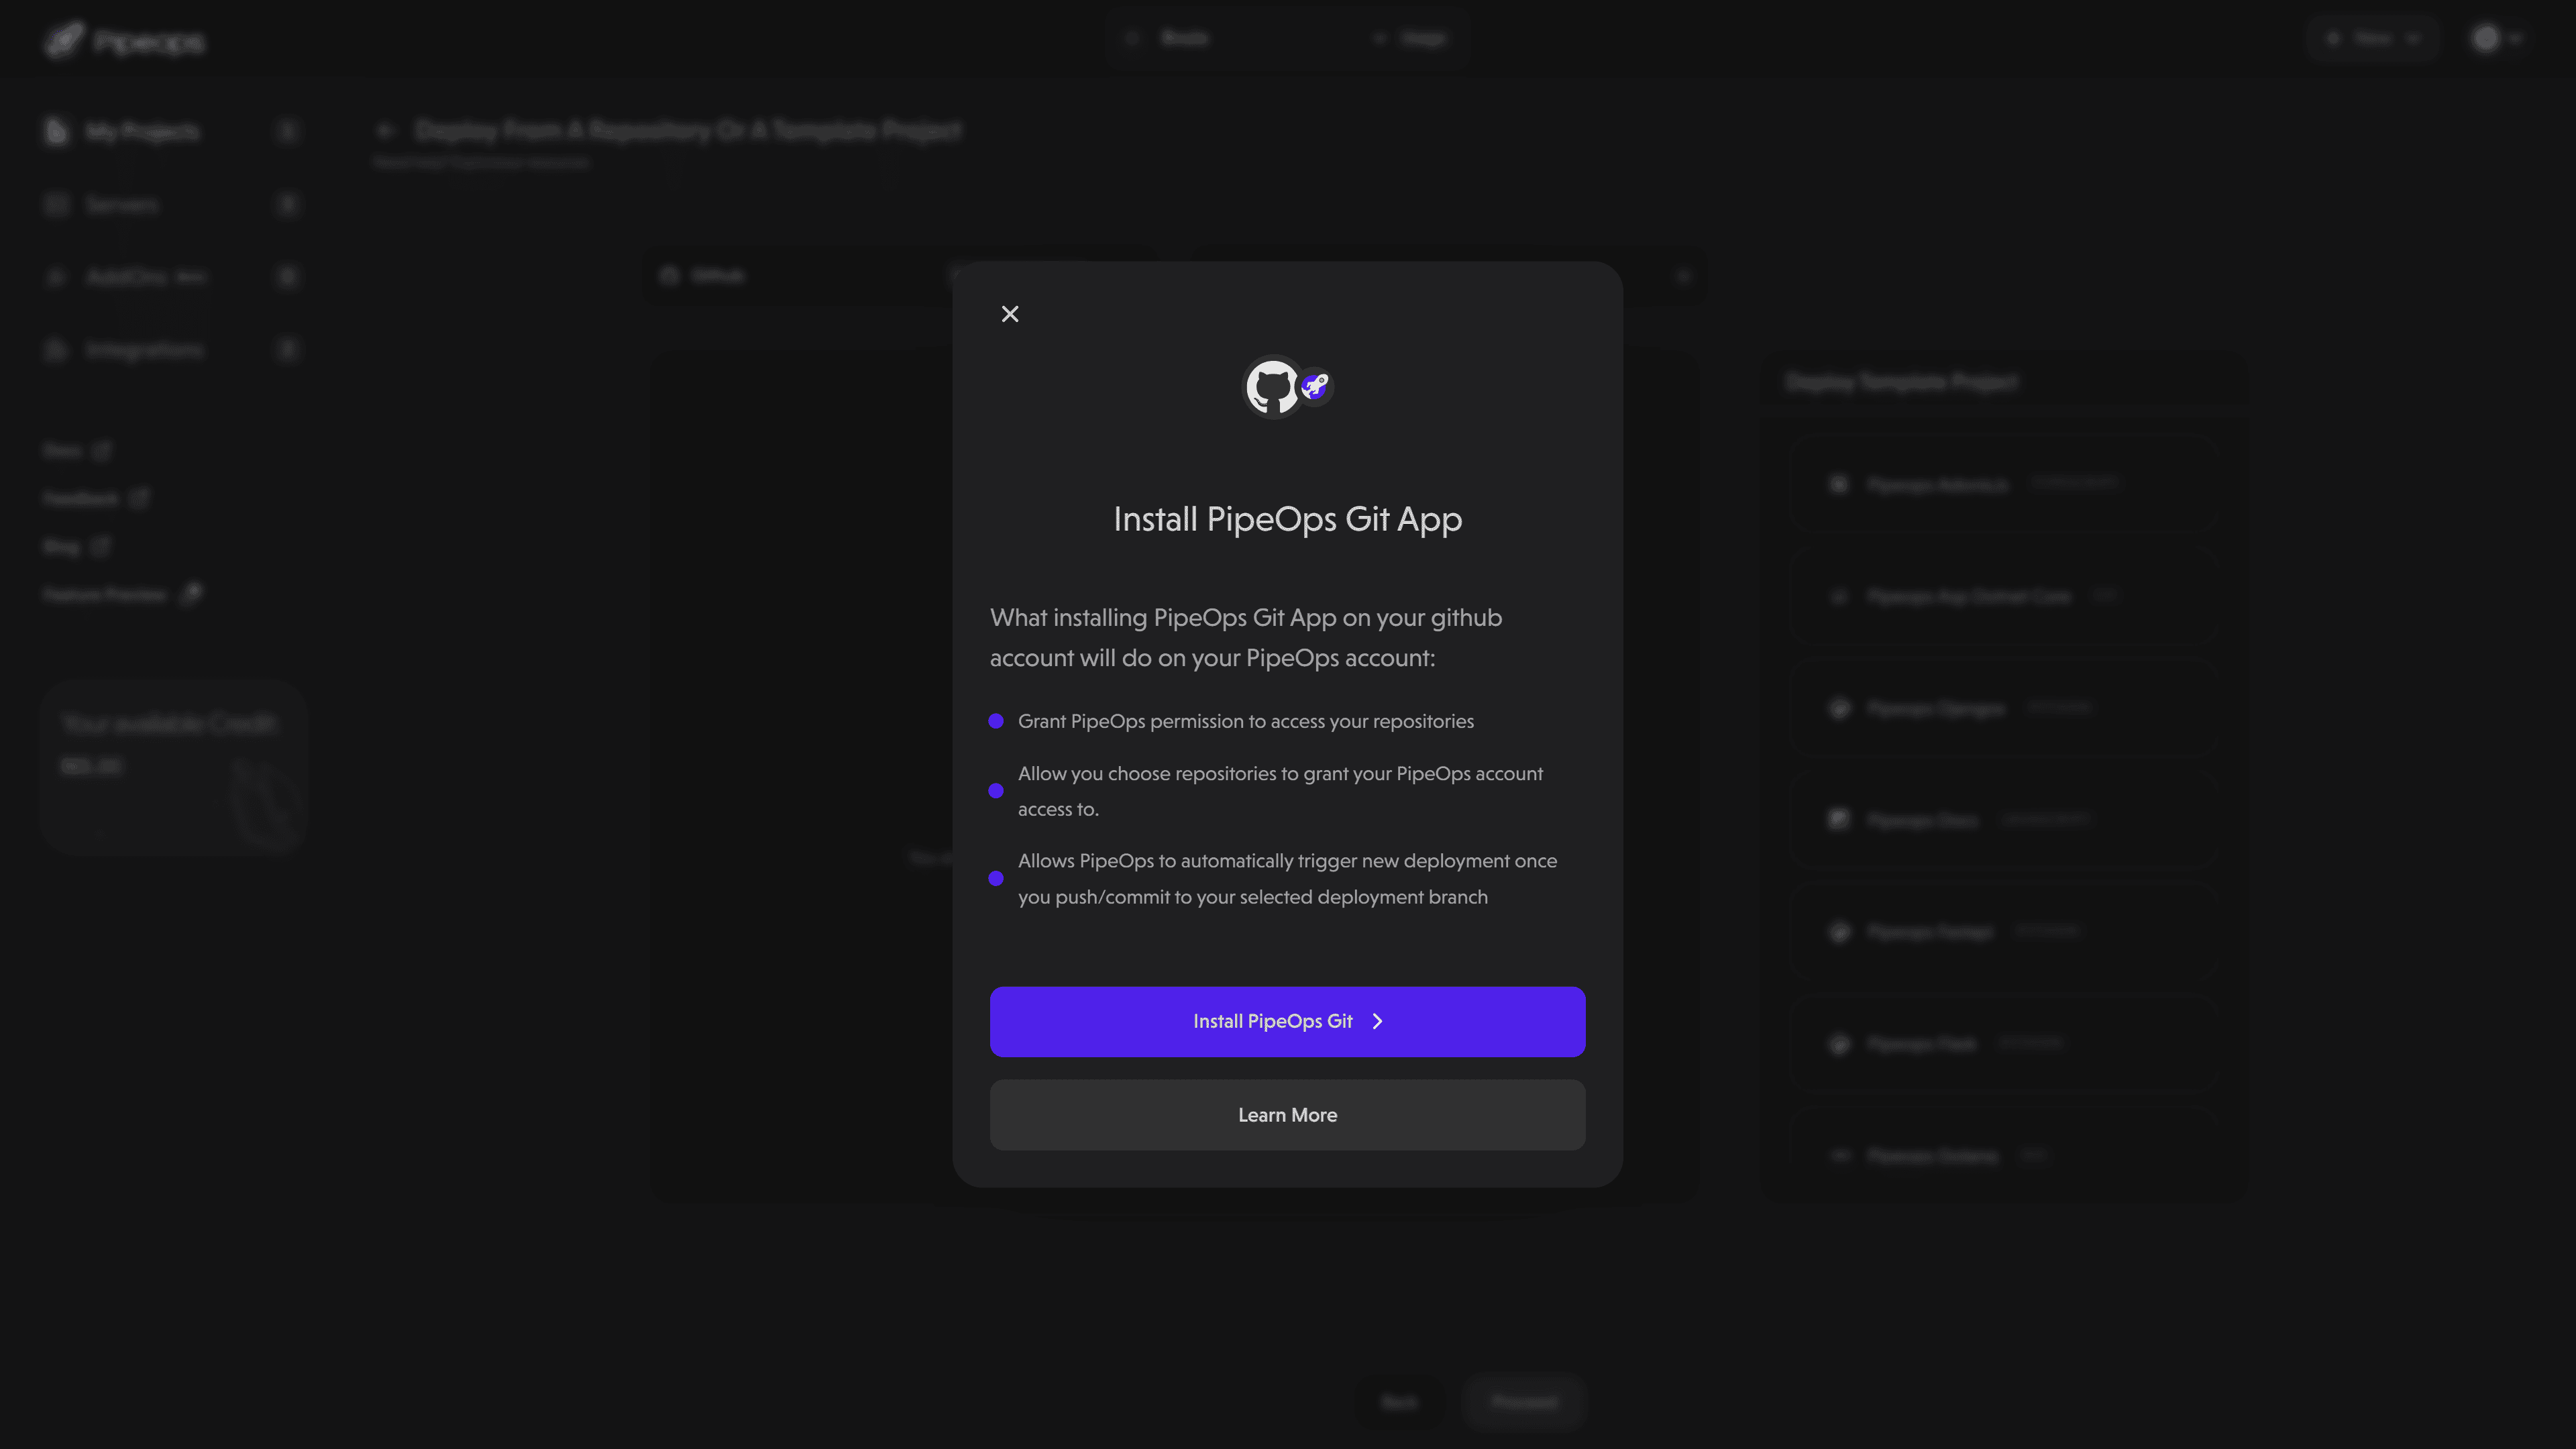
- Click the Install PipeOps Git button at the bottom of the modal. This will redirect you to an authorization page as shown below.
-
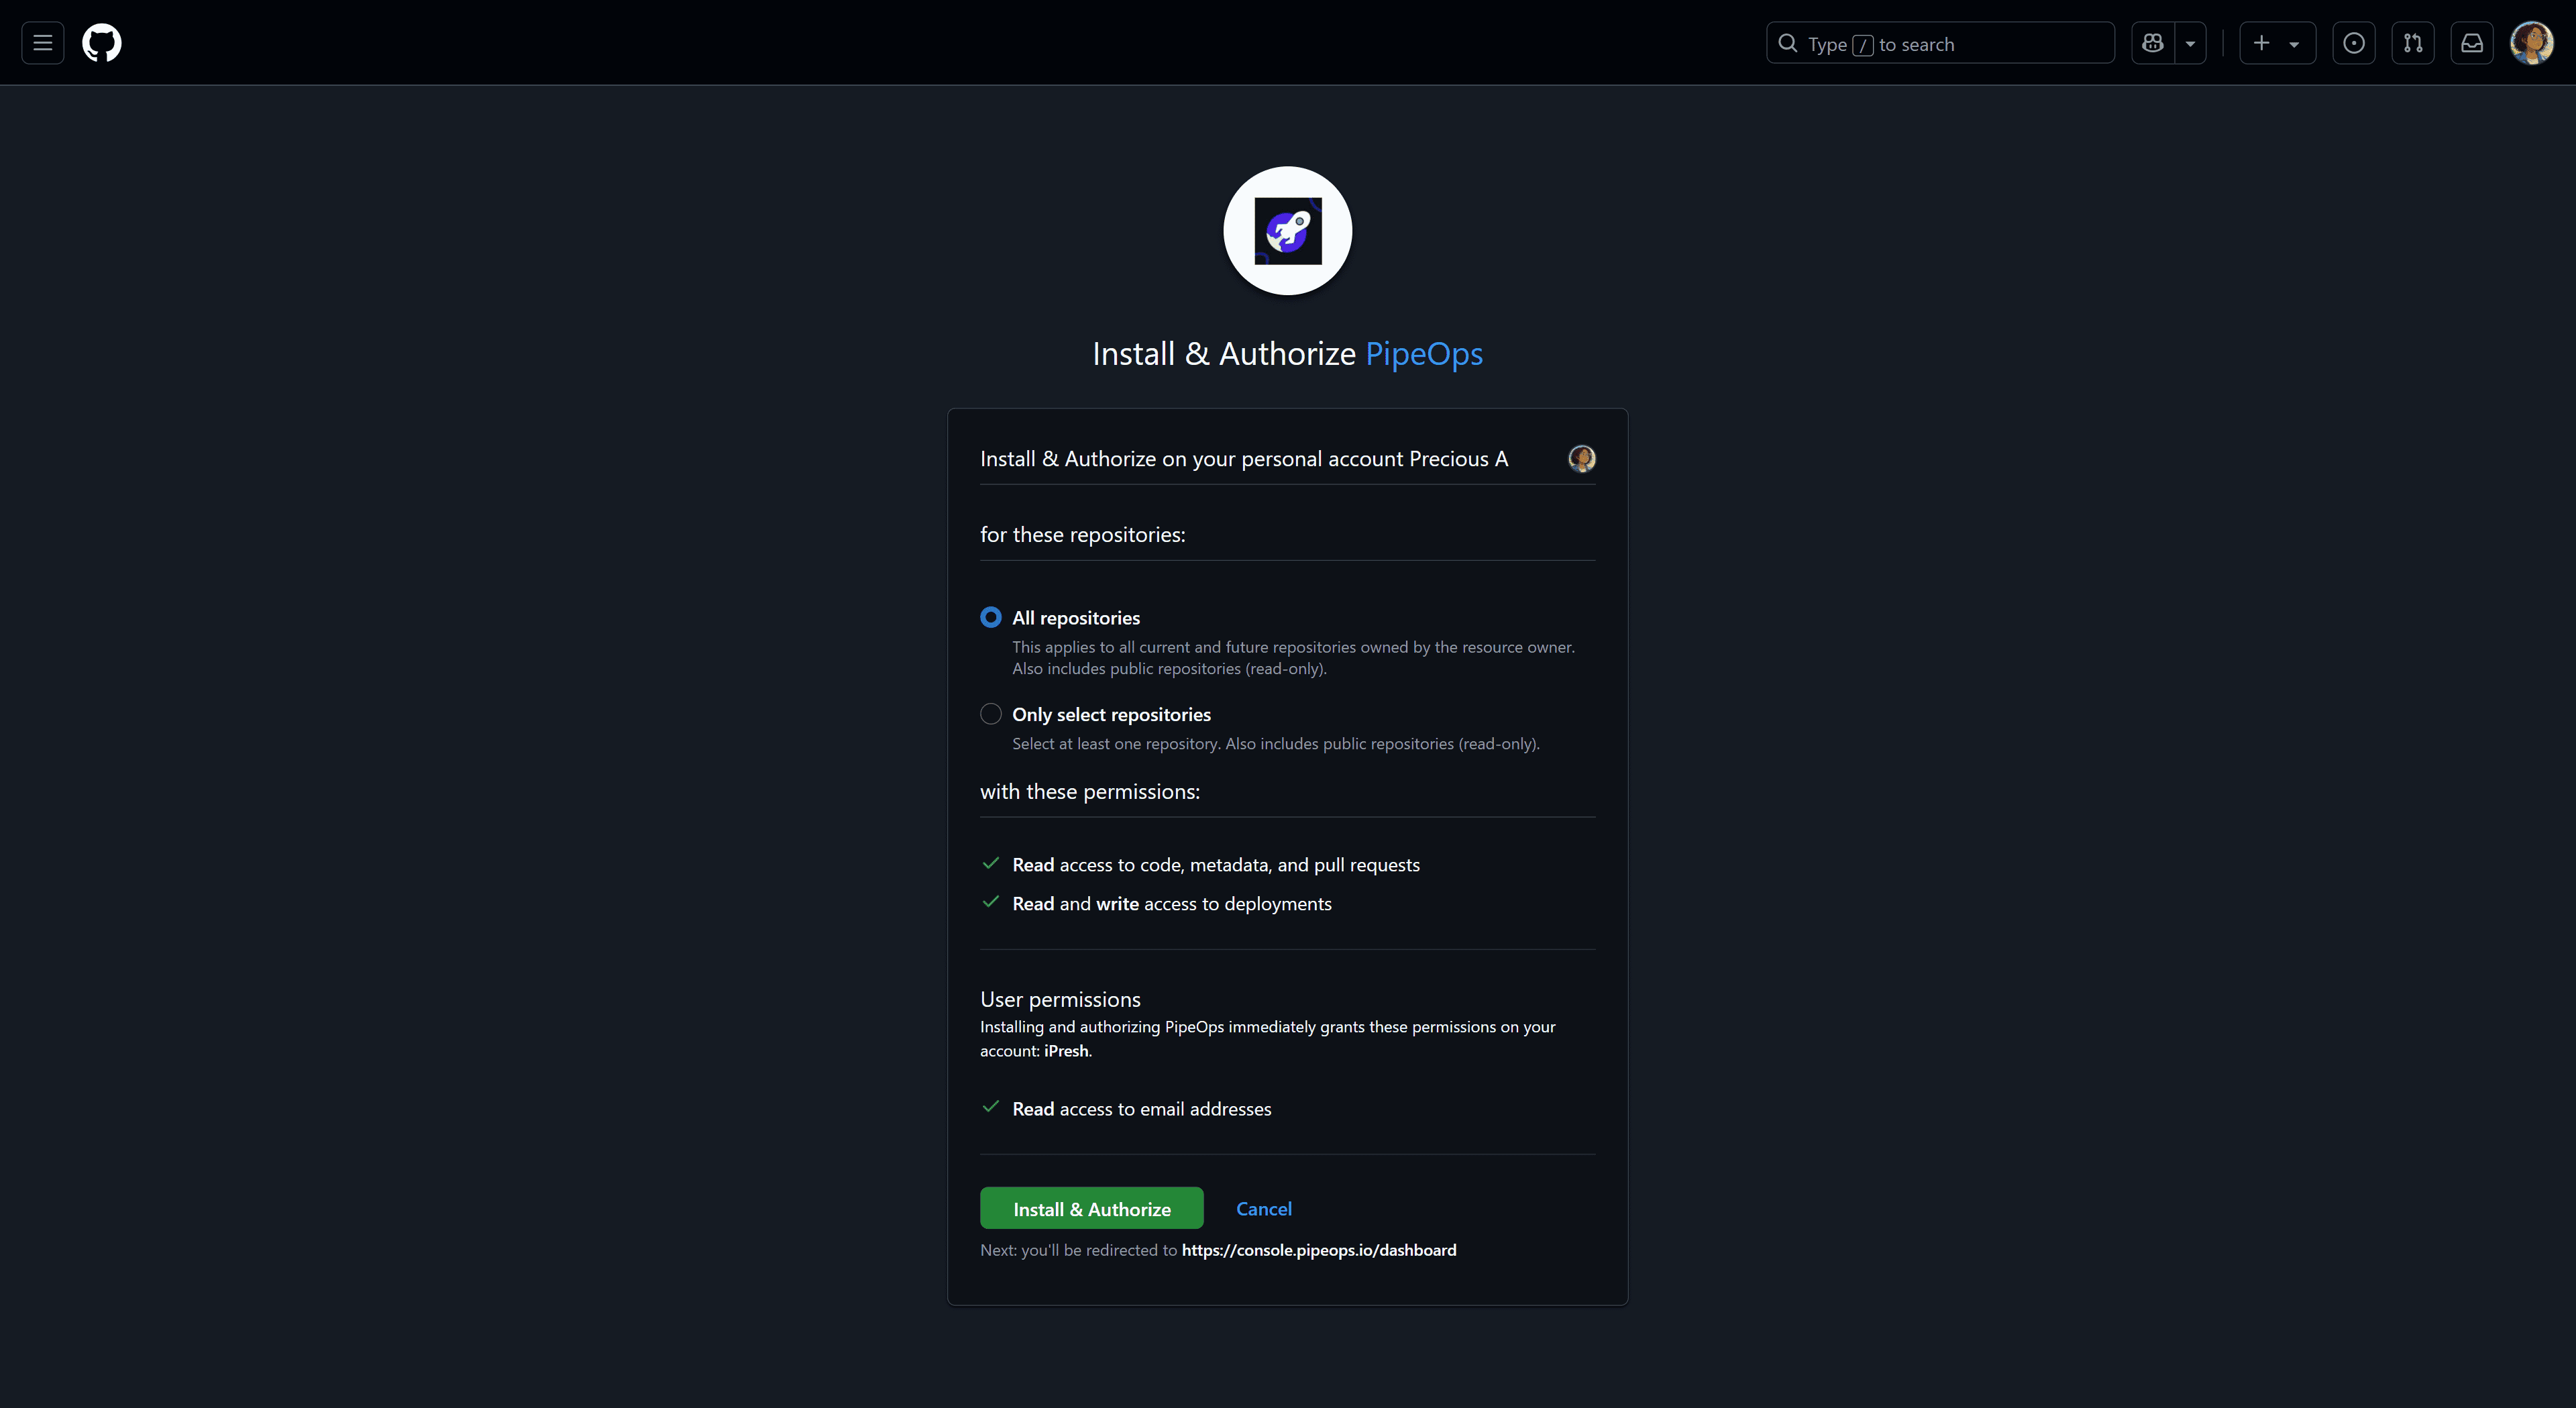
On this page, you can specify the scope of repository access:
-
All Repositories: Select this option to grant PipeOps access to both public and private repositories.
-
Only Select Repositories: Choose this option to grant access to specific repositories.
-
-
Click on the Install and Authorize button to proceed. You'll be redirected to the PipeOps project dashboard.
Now, when you select your GitHub profile, you'll be able to view both your private and public repositories.
How to remove PipeOps Authorization from a GitHub Account.
Maintain control and security by easily revoking PipeOps authorization from your GitHub account when needed. Should the necessity arise,
-
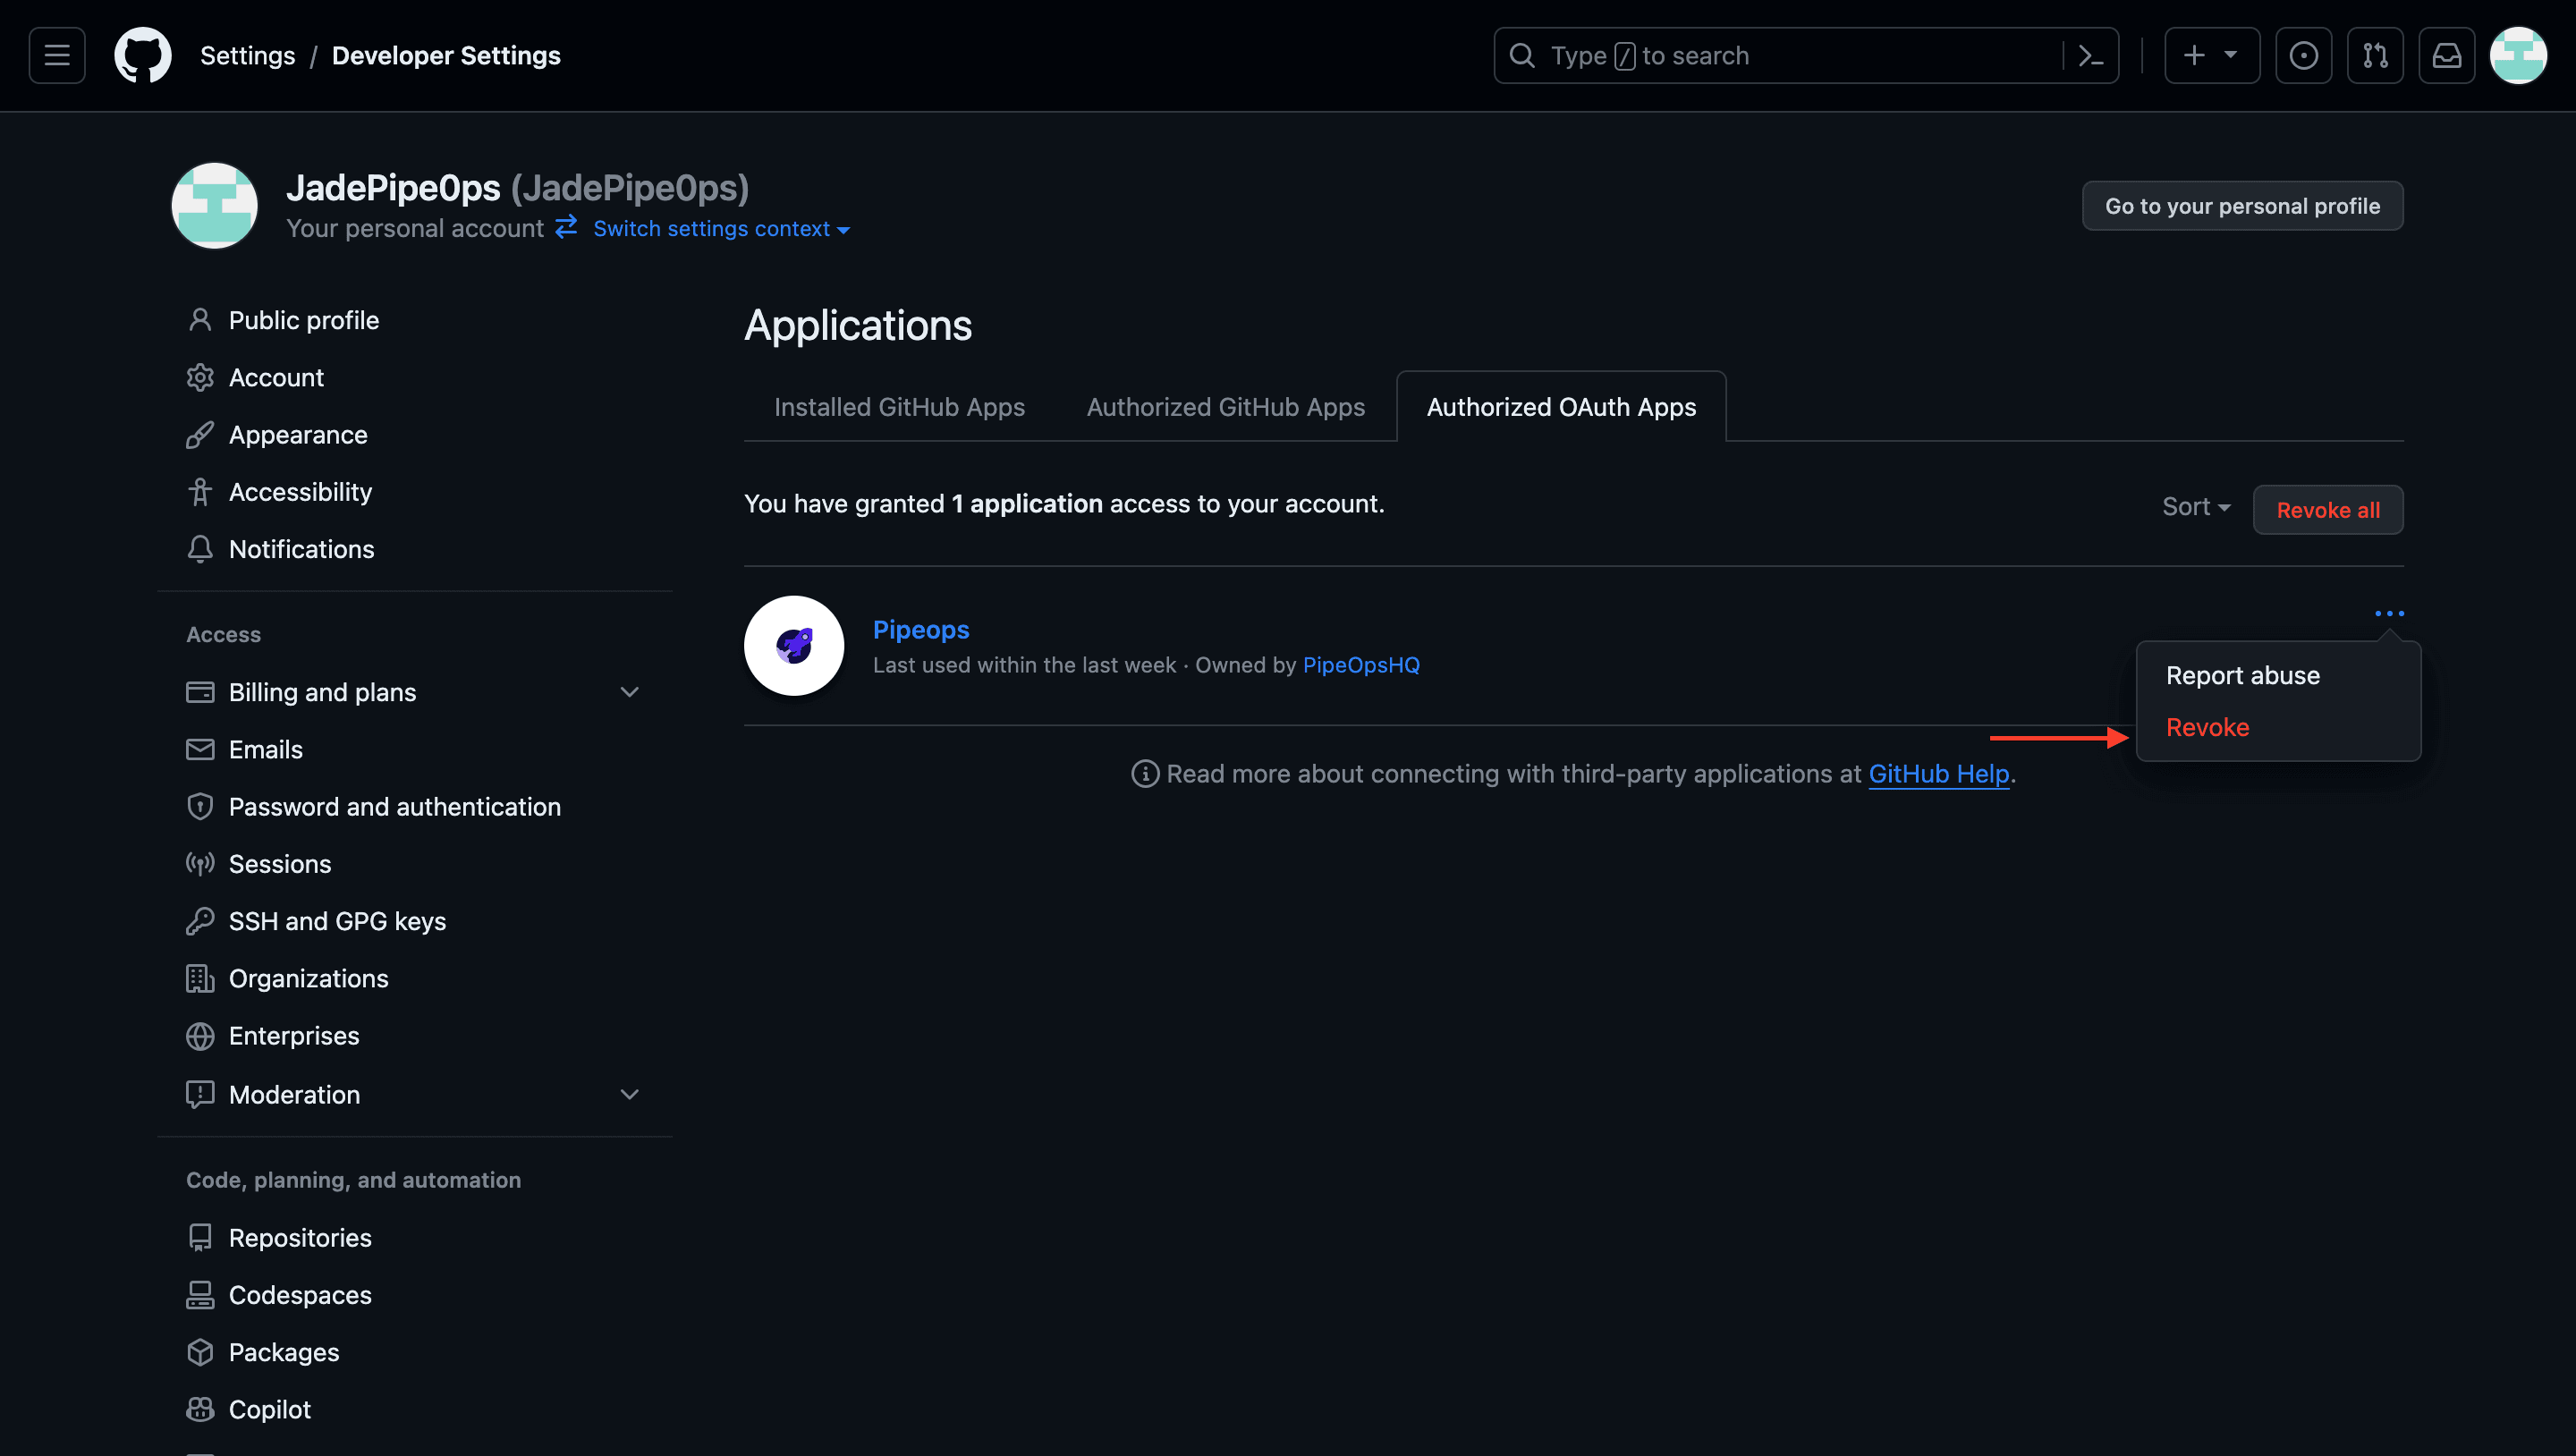
Navigate to your GitHub account settings, specifically the Authorized OAuth apps section.
-
Here, you'll find a list of connected applications, including PipeOps. Select PipeOps from the list and follow the prompts to revoke its authorization or you can revoke all to remove access to all your applications.
This simple yet crucial step ensures that you have full control over the access granted to PipeOps, allowing you to manage your GitHub integrations securely and in alignment with your preferences.