Overview
PipeOps makes it easy to deploy applications either from a connected Git repository or directly from a container registry. In addition to Git-based deployments, PipeOps now supports deploying container images from:
- Docker Hub
- Amazon Elastic Container Registry (Amazon ECR)
- GitHub Container Registry (GHCR)
This guide focuses on deploying an application from Docker Hub using the public nginxdemos/hello image. The same workflow applies to other public Docker Hub images. If you're deploying a private image, you'll need to authenticate your Docker Hub account before selecting the image.
Prerequisites
Before you begin, ensure you have:
- A PipeOps account (sign up if you don't have one at pipeops.io)
- A Docker image available on Docker Hub.
- The image name and tag you want to deploy.
- A Docker Hub account (only required for private images).
Step 1: Sign in to PipeOps
Log in to your PipeOps account and navigate to the project where you want to deploy your application. https://docs.pipeops.io/docs/getting-started/user-registration
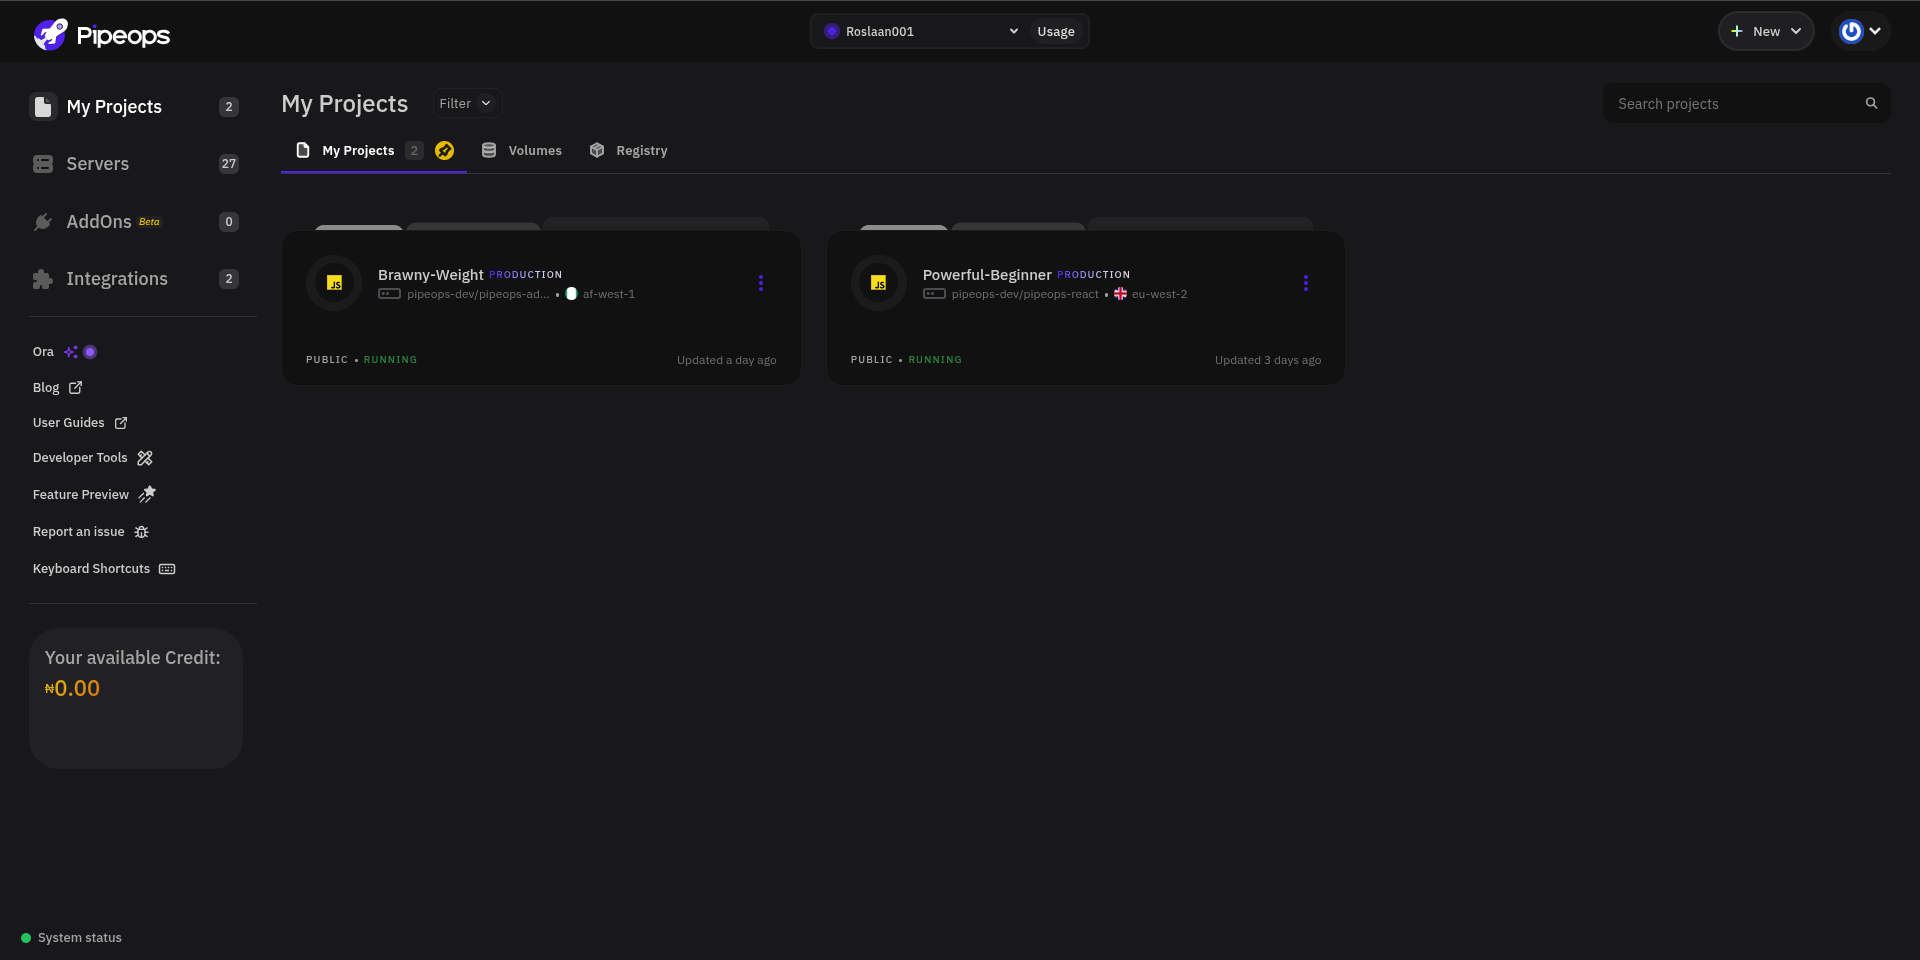
Step 2: Create a New Deployment
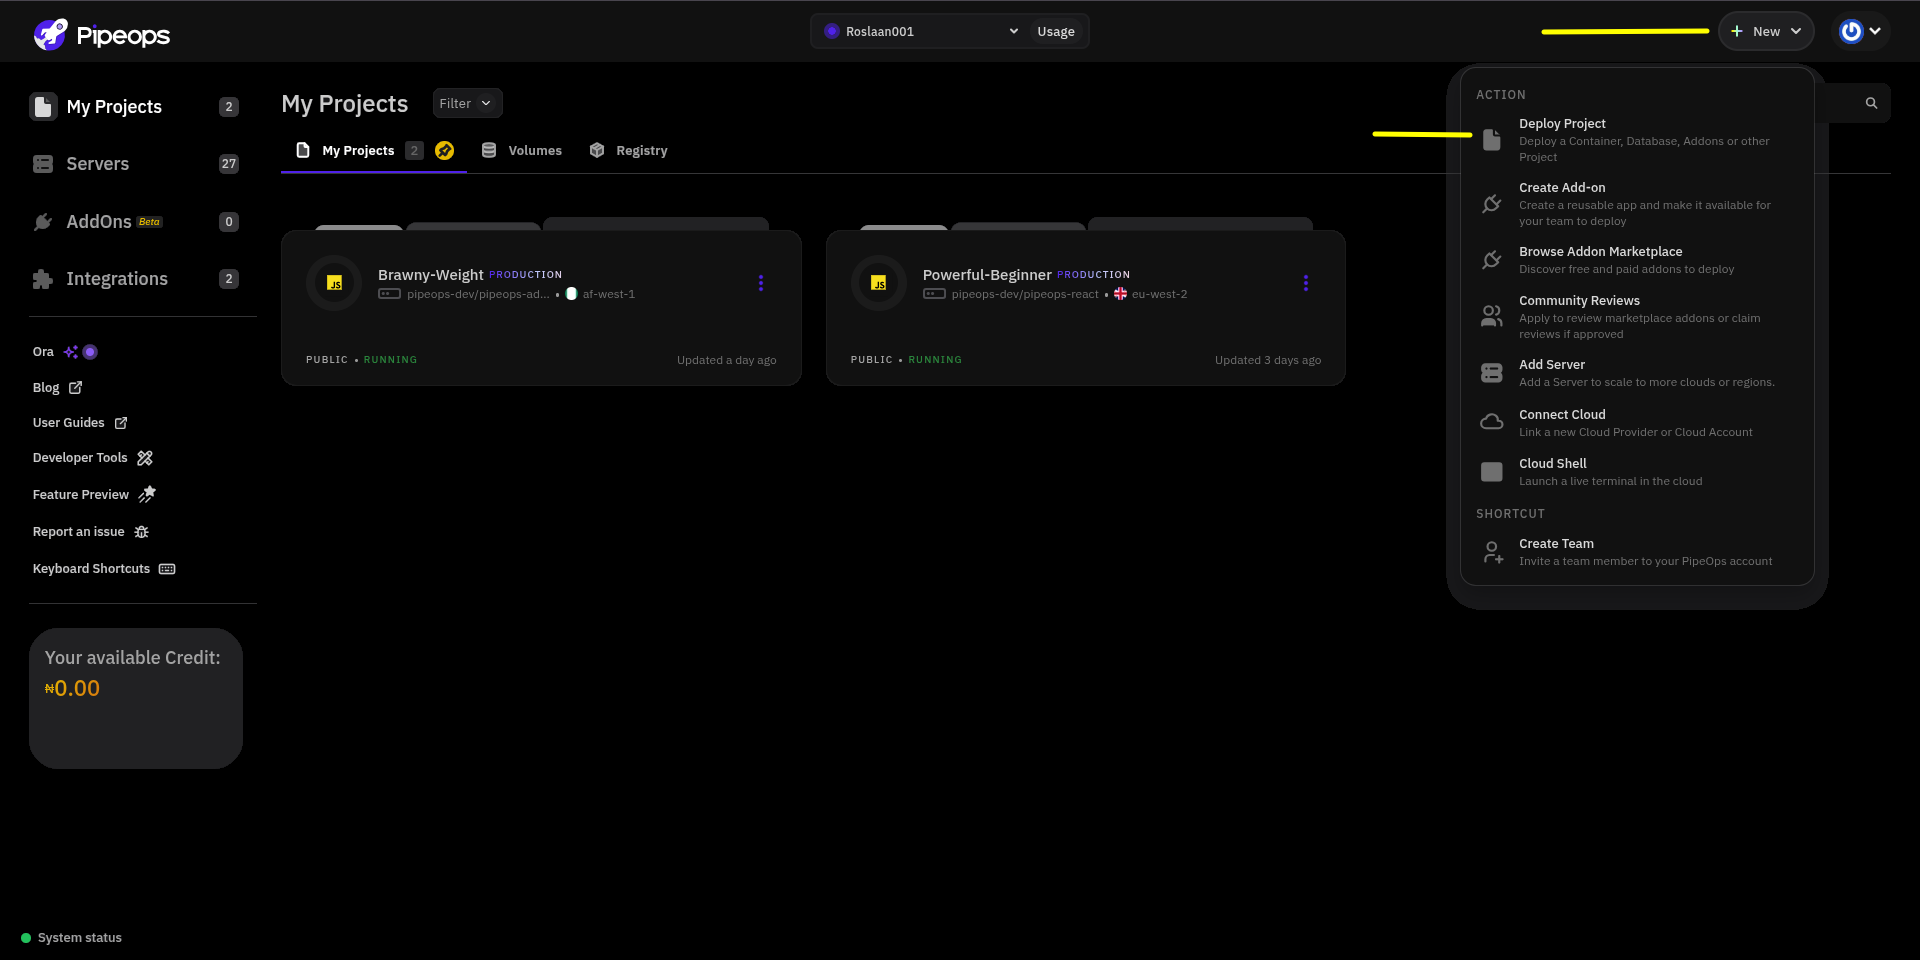
From your project dashboard, click New at the top right, then in the dropdown, click Deploy Project to begin creating a new deployment.
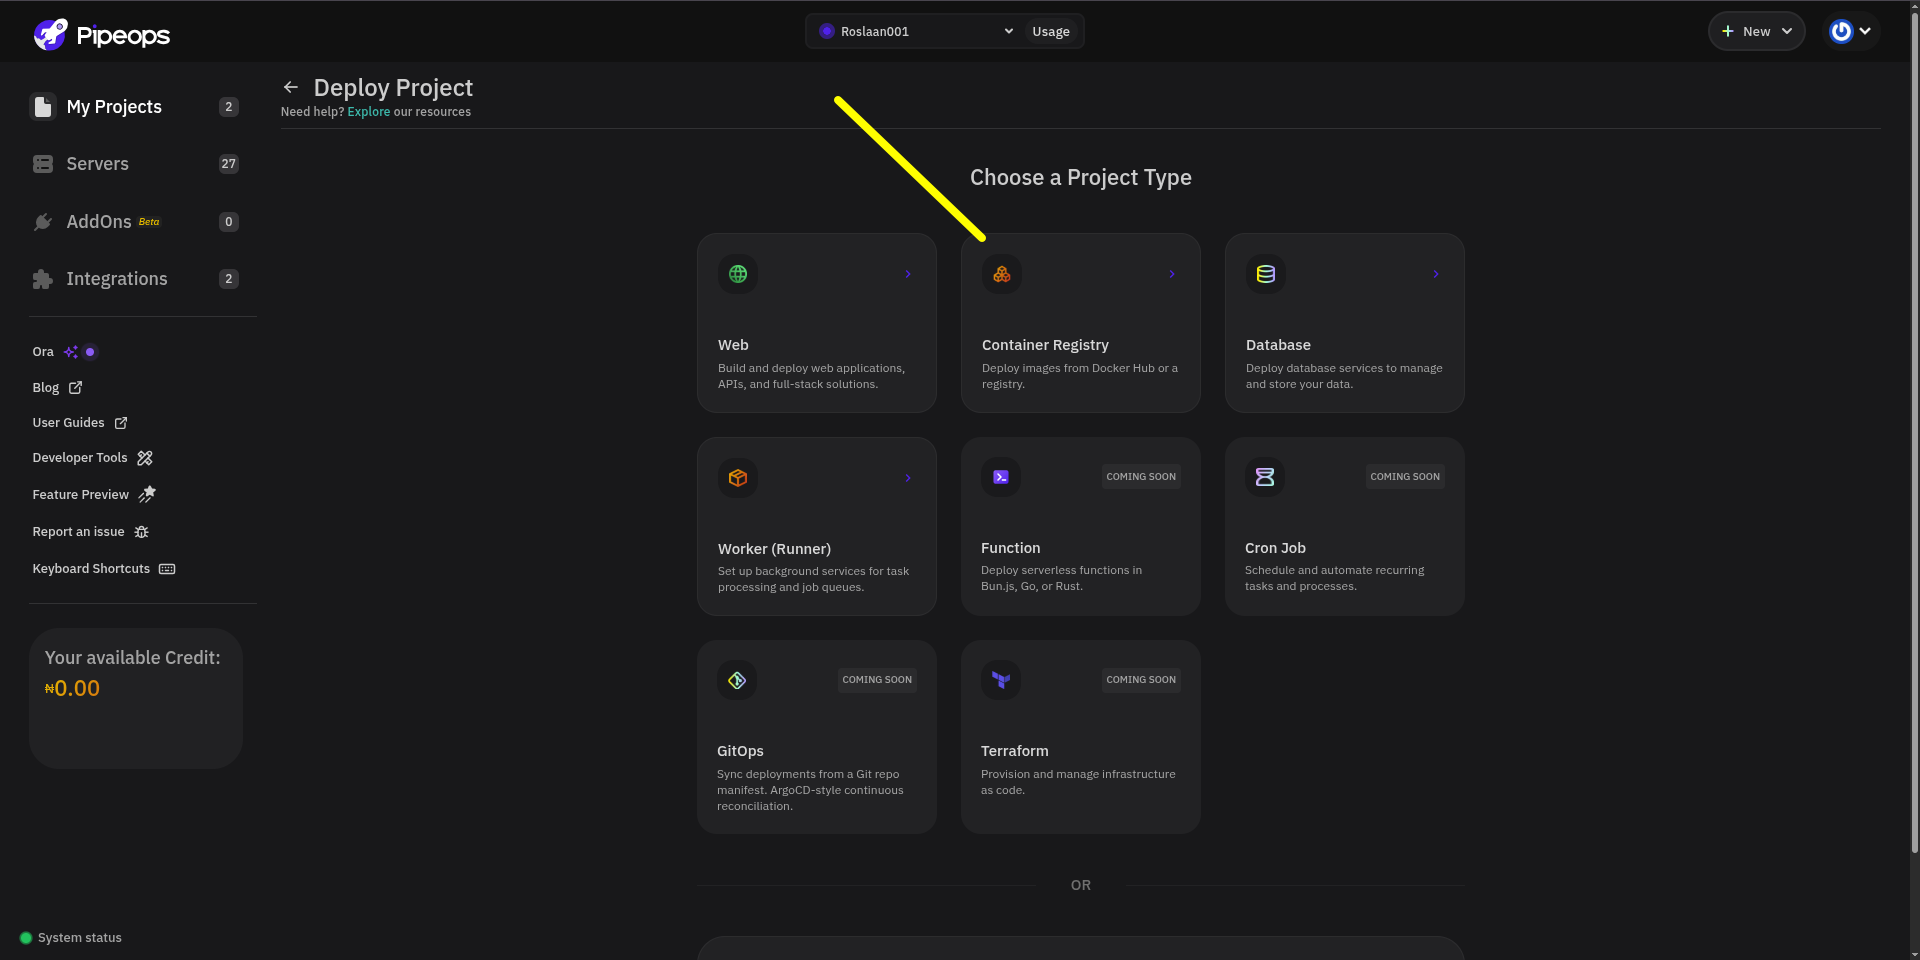
At the deploy-project page, choose Container Registry
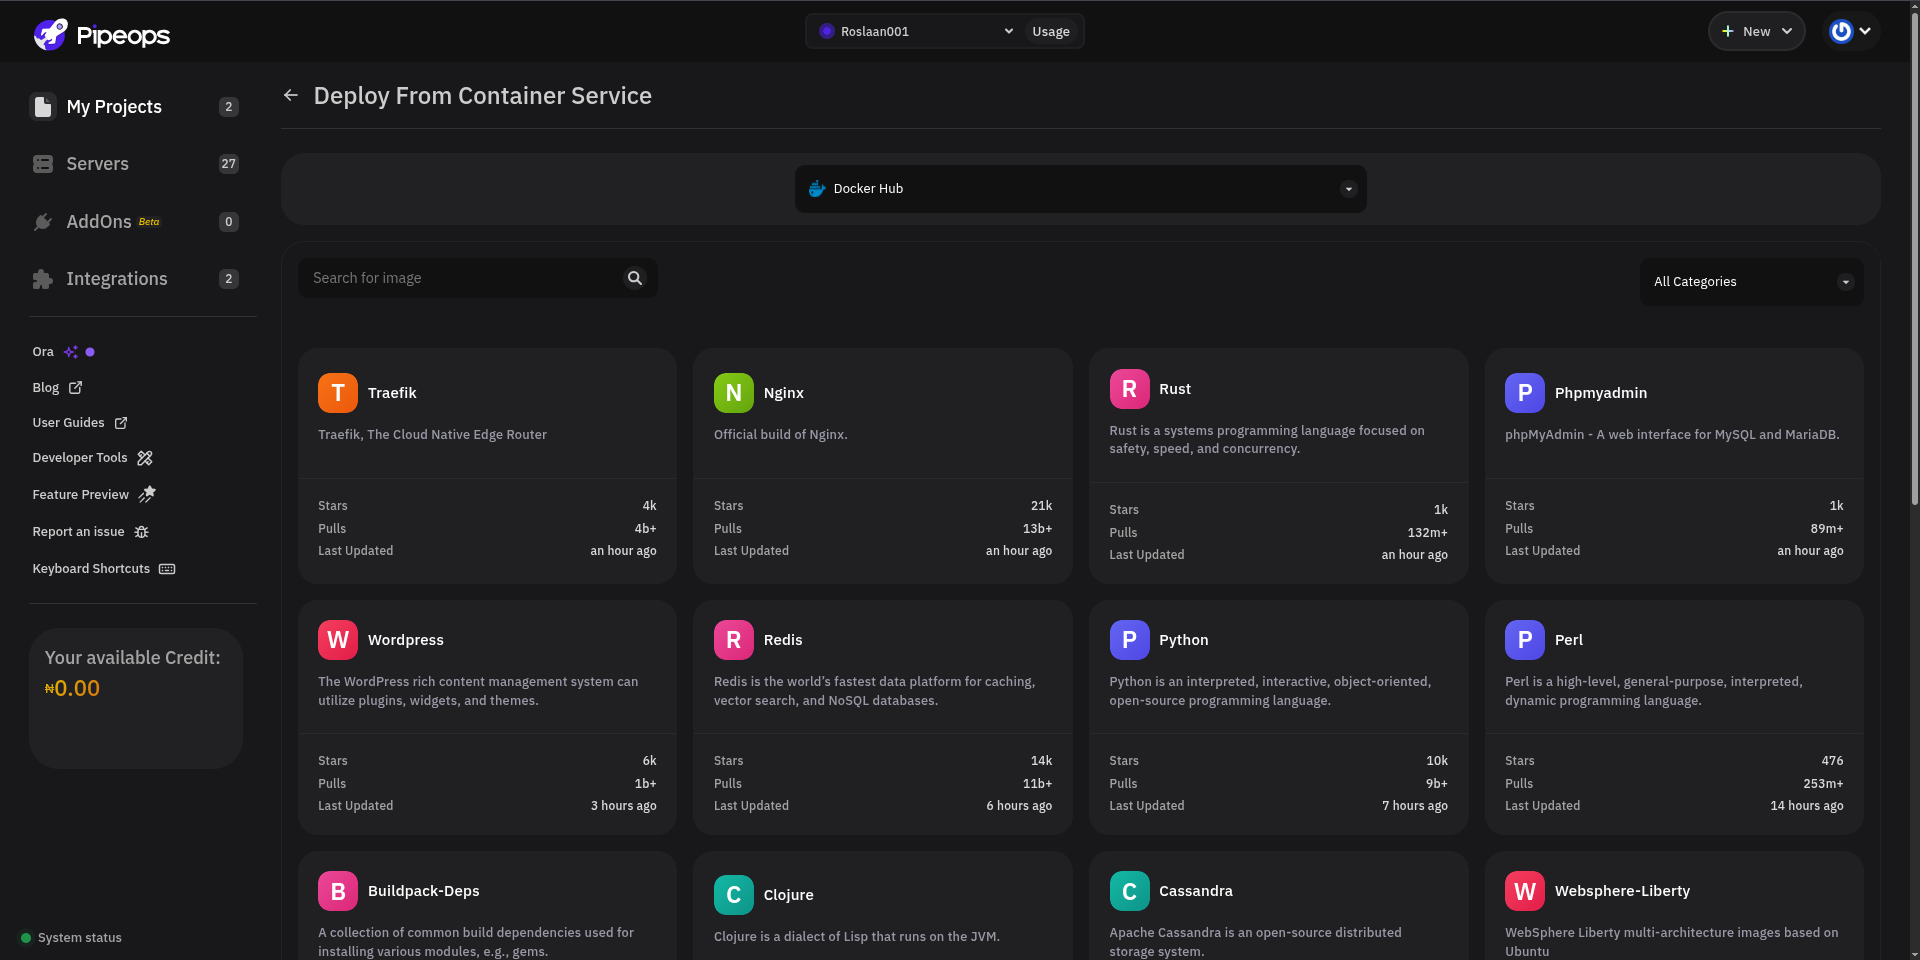
Step 3: Deploy from Container Service
By default, the deploy from container service shows Docker Hub, you can change it by clicking on the dropdown
PipeOps also supports Amazon ECR and GitHub Container Registry (GHCR), but for this guide we'll deploy an image hosted on Docker Hub.
Step 4: Choose Your Docker Image
PipeOps supports deploying both public and private Docker Hub images.
Deploying a Public Image
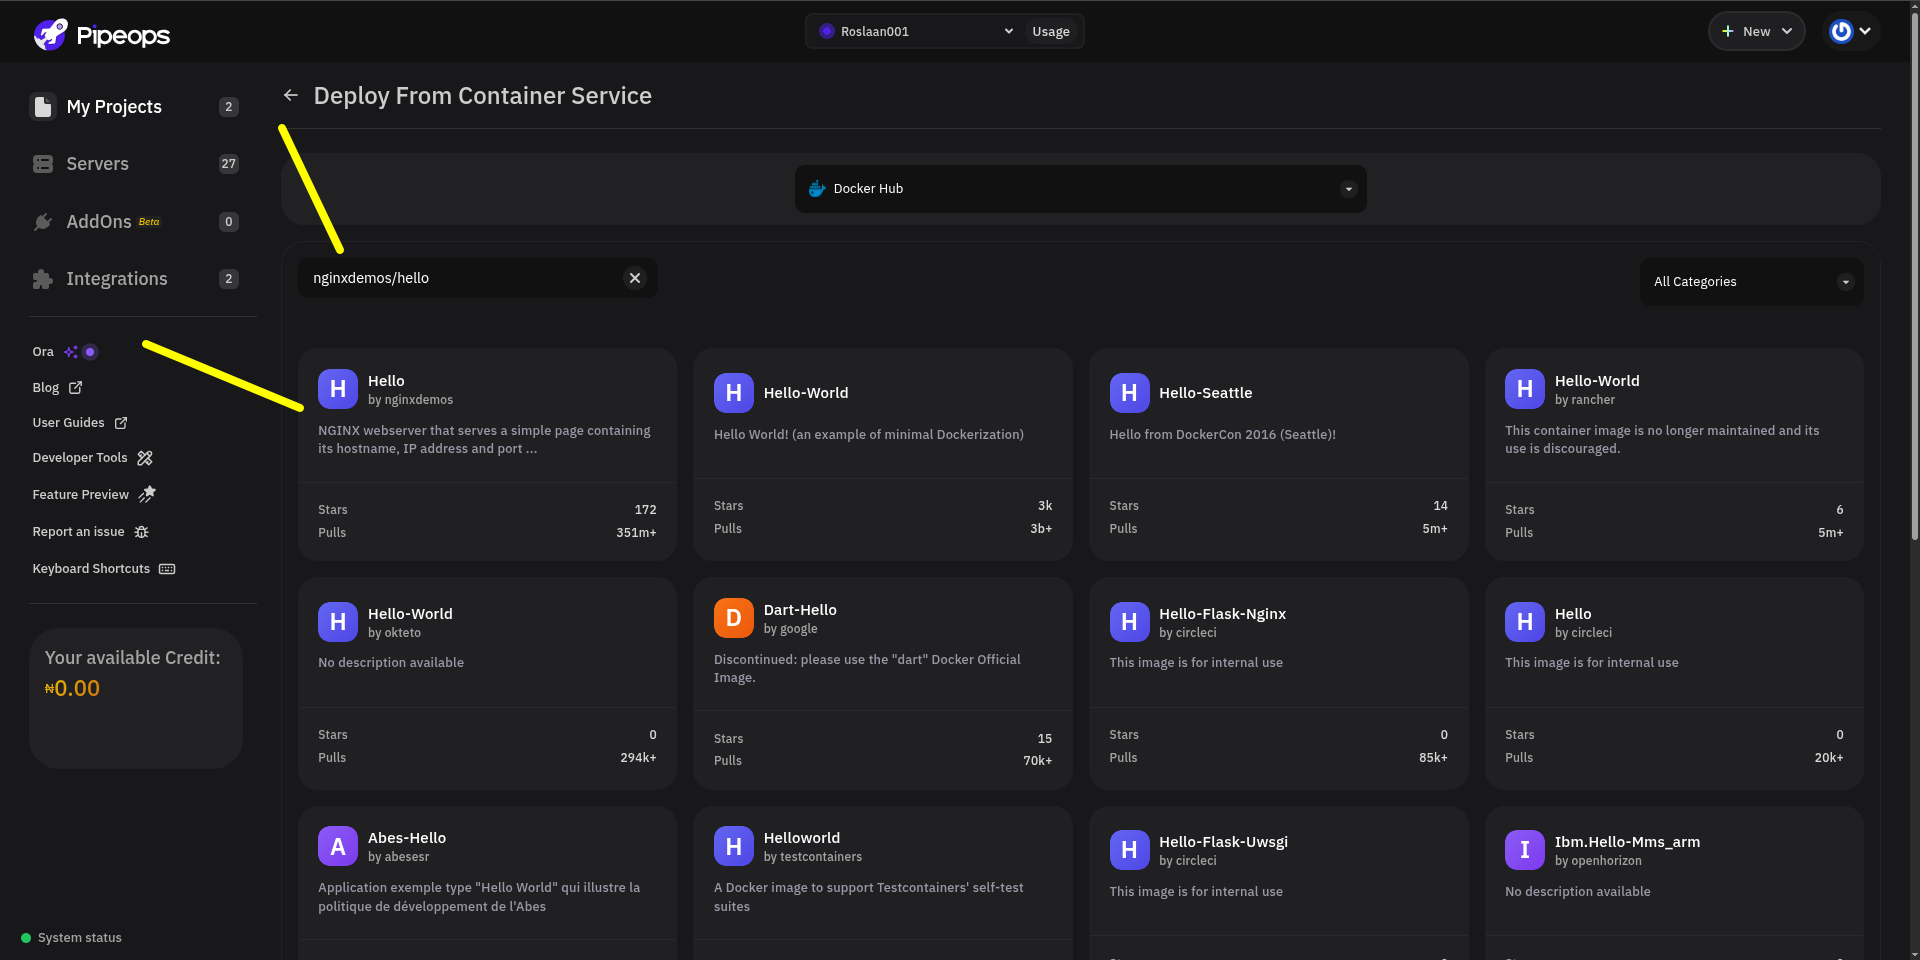
For this tutorial, we'll deploy the public nginxdemos/hello image.
- Enter nginxdemos/hello in the search bar.
- Select the image from the search results.
- Choose the latest tag (or another tag if preferred).
Public images can be deployed without connecting your Docker Hub account.
Deploying a Private Image
If you're deploying a private Docker Hub image:
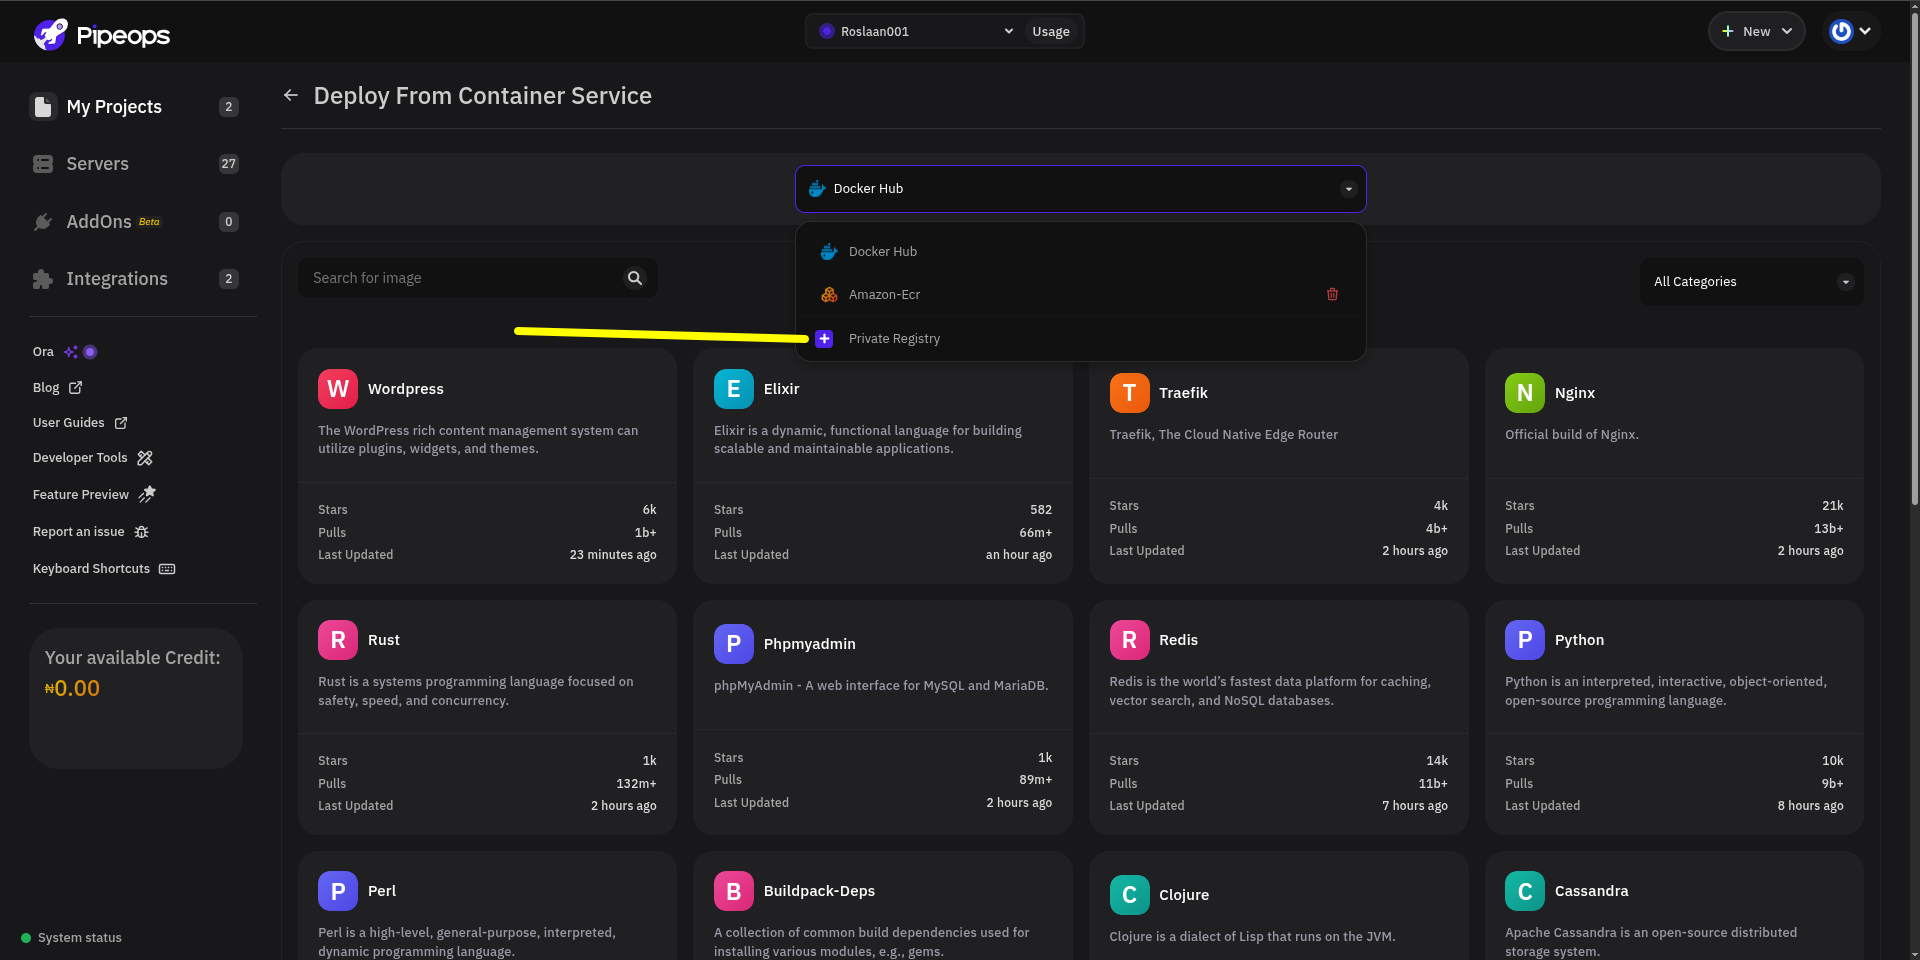
- Click the dropdown
- Click private registry
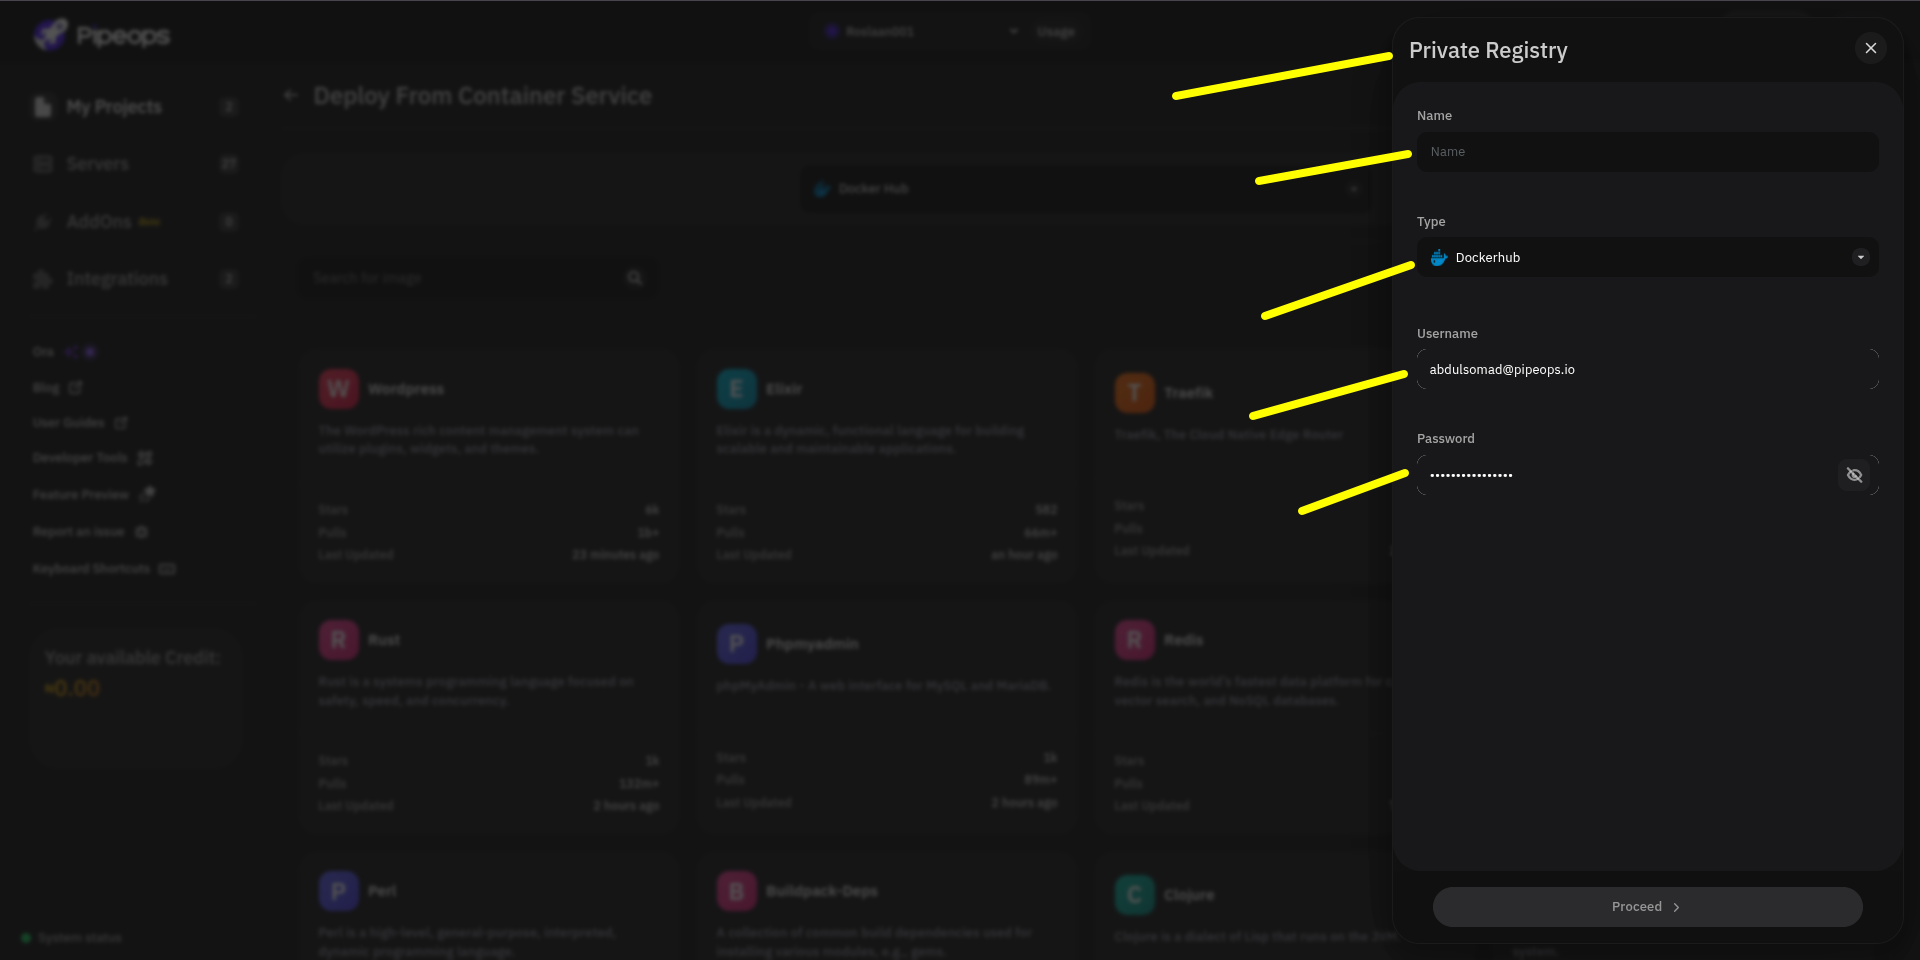
- Authenticate with your Docker Hub account by inputting name, type, username and password
- After authentication, PipeOps will display the private repositories your account has access to.
- Select your repository and choose the image tag you want to deploy.
Note: You only need to authenticate your Docker Hub account once. After it's connected, you'll be able to access your private repositories for future deployments.
Step 5: Configure Your Project Summary
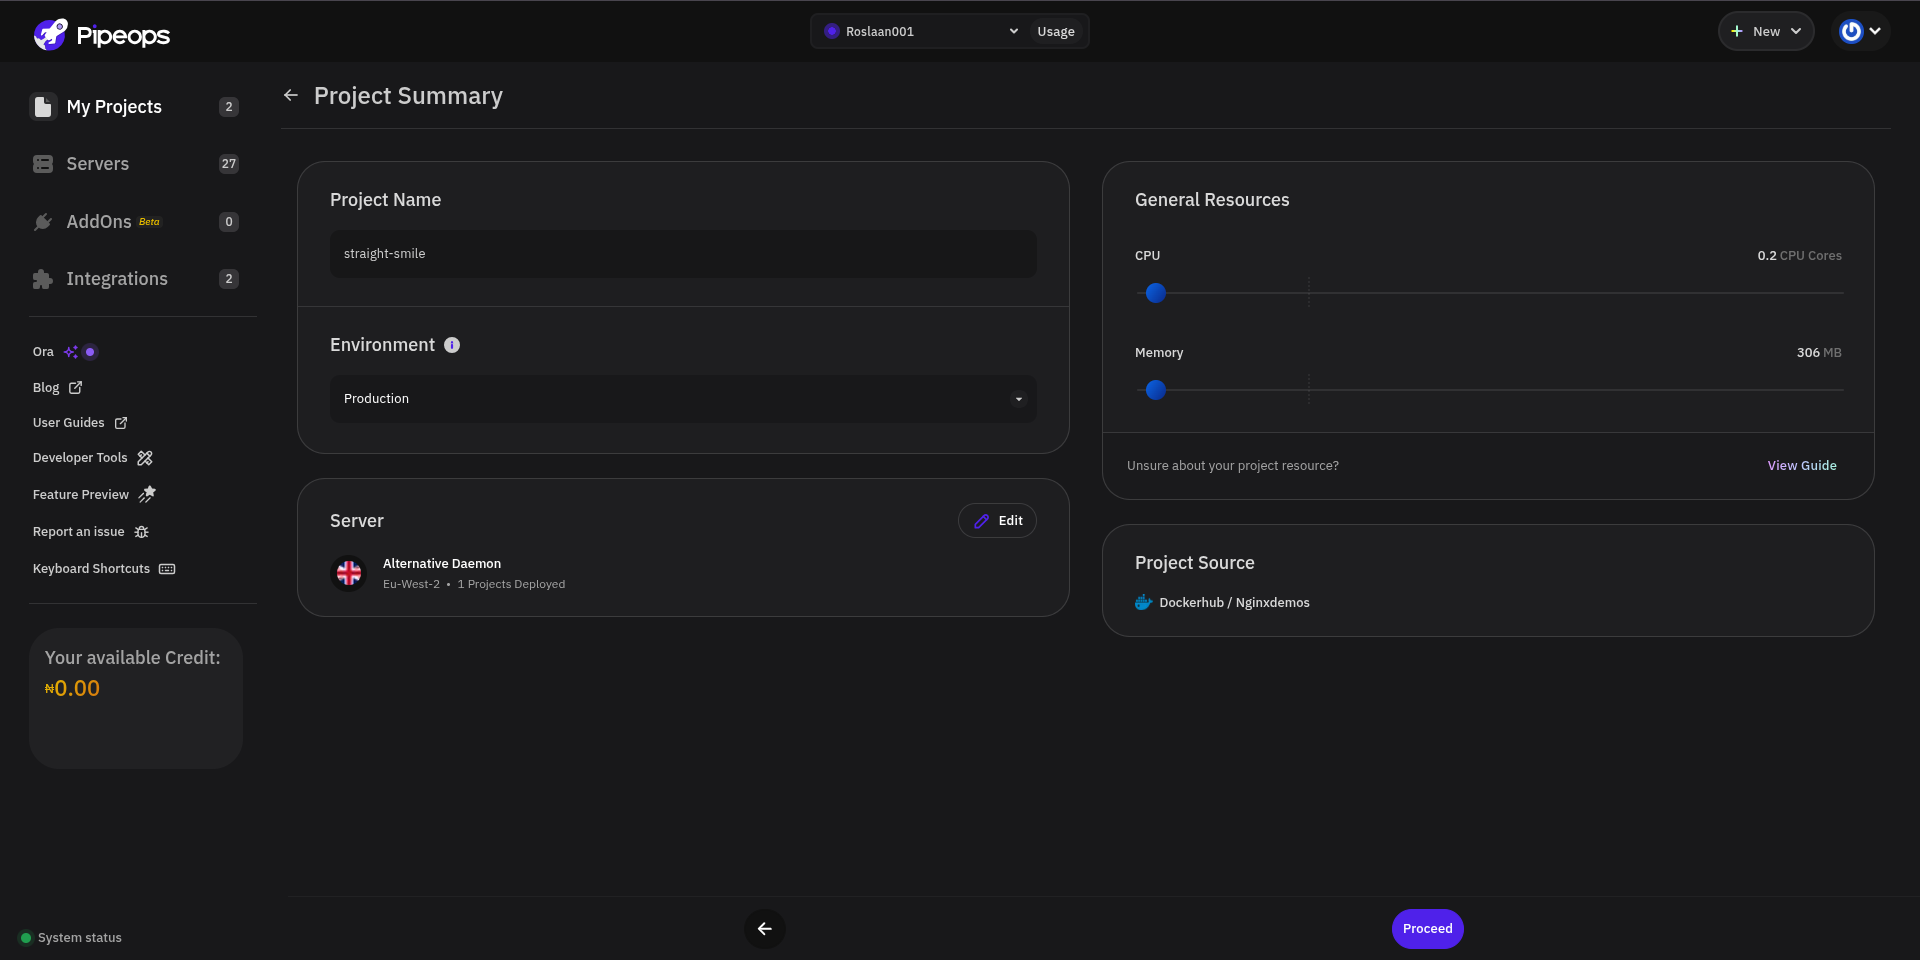
After selecting your image, you have your project summary page, Enter a project name, , adjust the resources (CPU and memory), choose your environment, choose your server and also view the project source (in this case, the project source is Docker Hub).
Once you are satisfied with your project summary, click Proceed
Depending on your deployment, you may need to configure:
- Project name
- CPU and memory allocation
Step 6: Configure your Project Build Settings
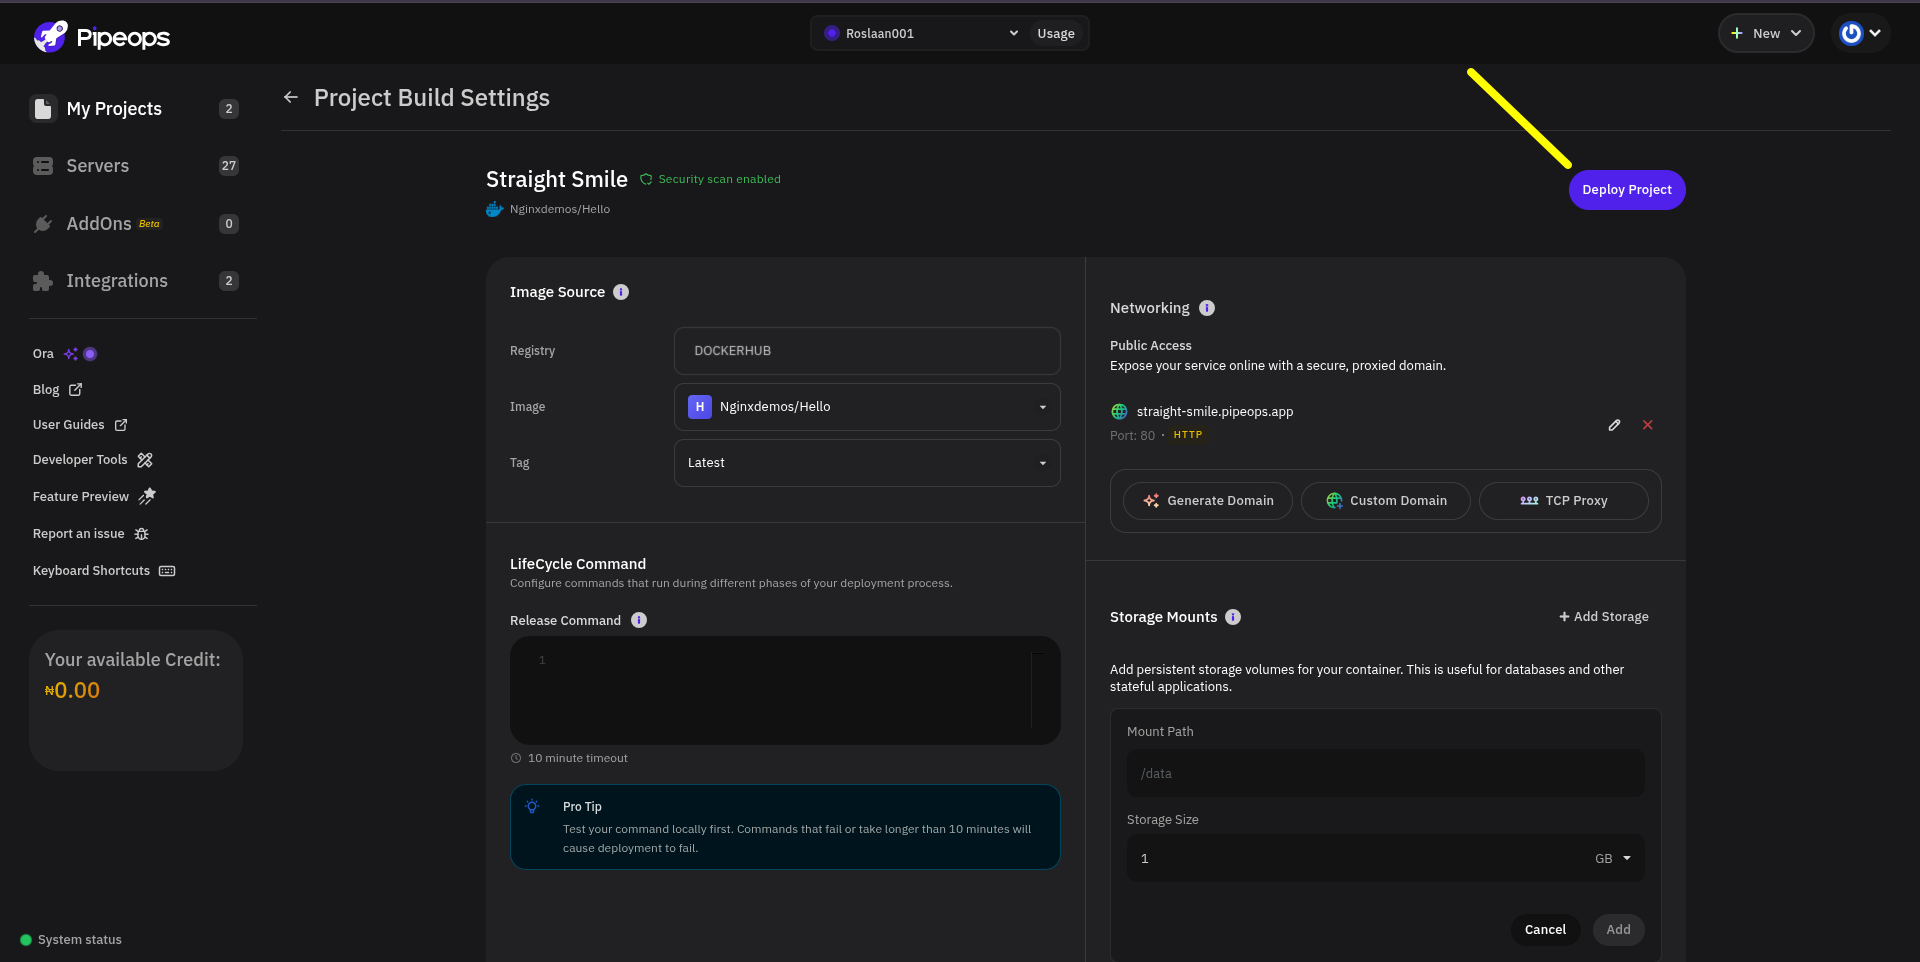
At the project build settings, you have five main parts; Image Source, Networking, Lifecycle Command, Storage Mounts, and Environment Variables.
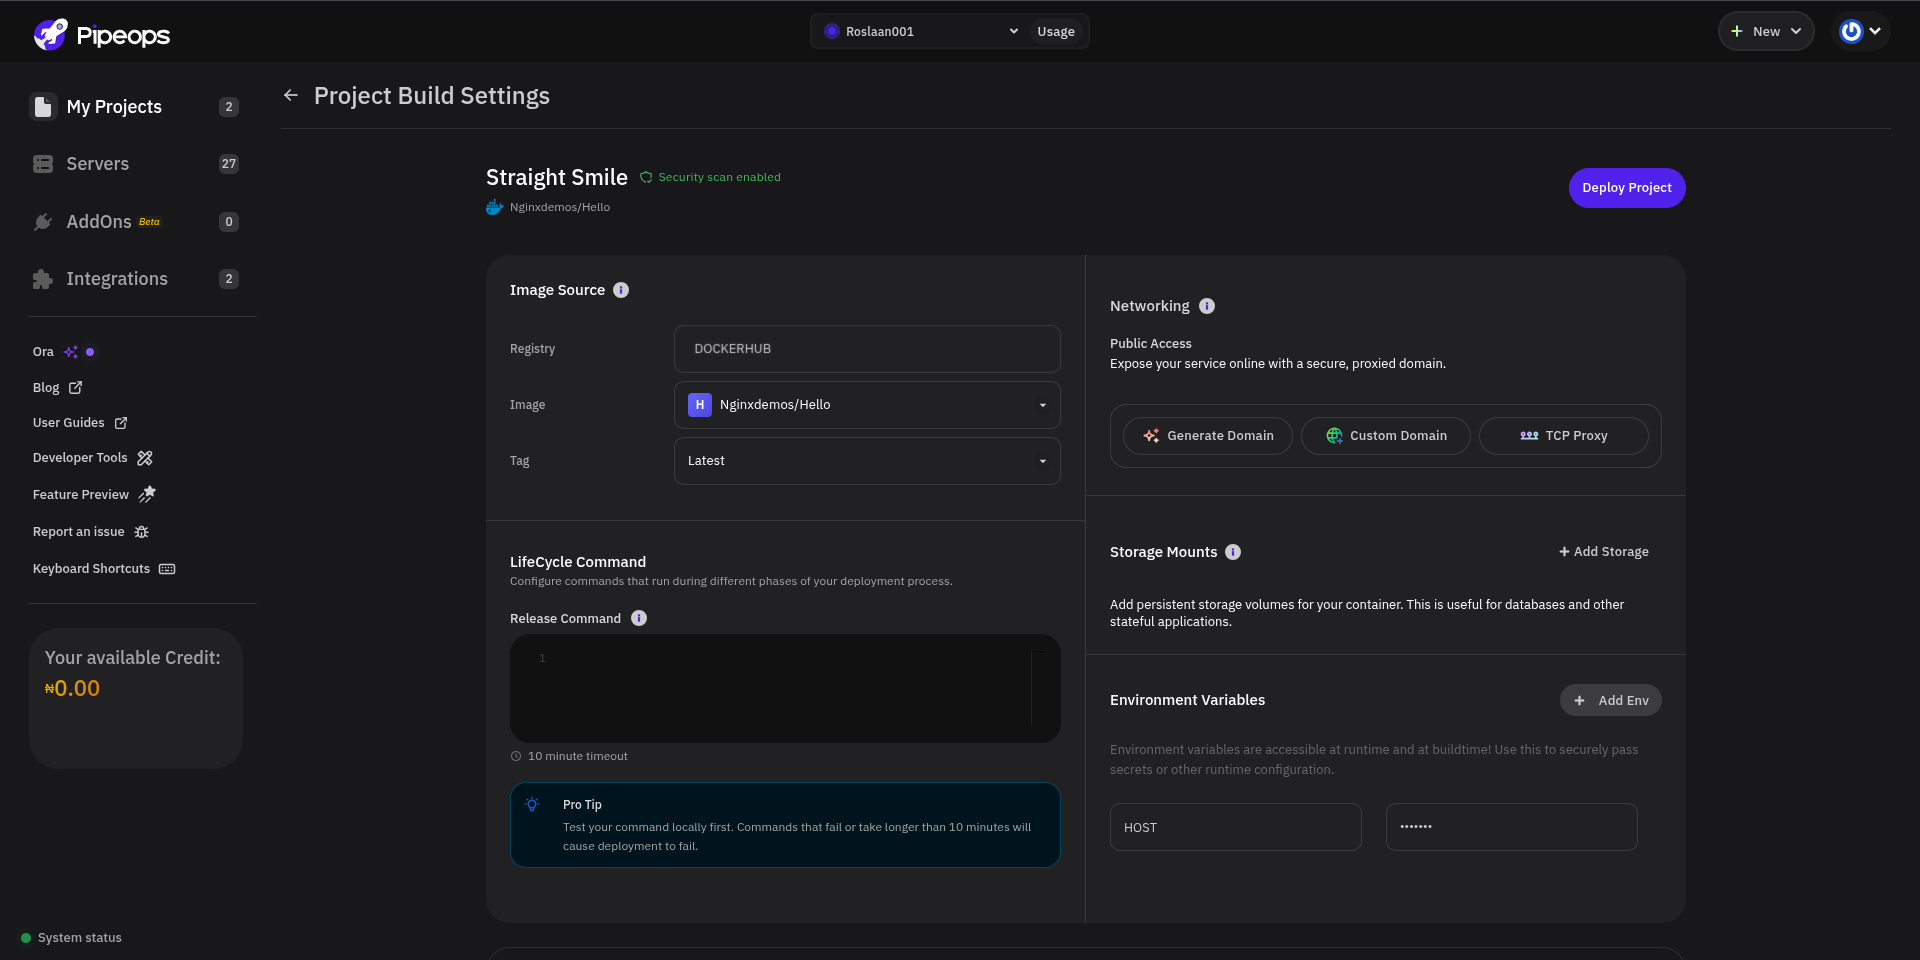
Image Source: This is basically an information about your image, you do not need to touch or modify anything there, unless you want to change the tag which you just need to click the tag dropdown and select the tag you want.
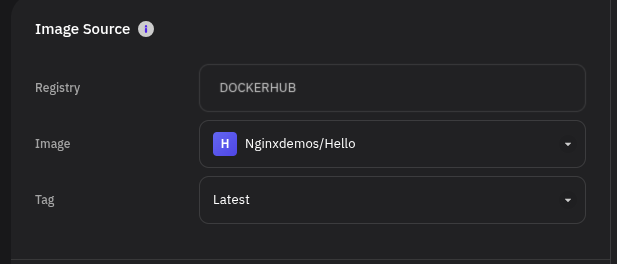
Lifecycle Command: This is where you configure commands that run during different phases of your deployment process. We do not need it in this case
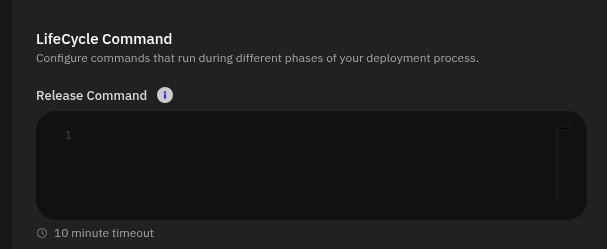
Networking: Here you have the generate domain, custom domain and TCP proxy. Since we are deploying an image, we need to click generate domain (if you have a custom domain, you can click custom domain, after clicking on generate domain, you enter the port of your image (for Docker Hub image, always check the Docker Hub for the port you need to expose). In this case, the port is 80 for our nginxdemos/hello image. After inputting the port, click Generate Domain and you should have something like straight-smile.pipeops.app (yours will have a different name but will always ends with ".pipeops.app" unless you are using a custom domain
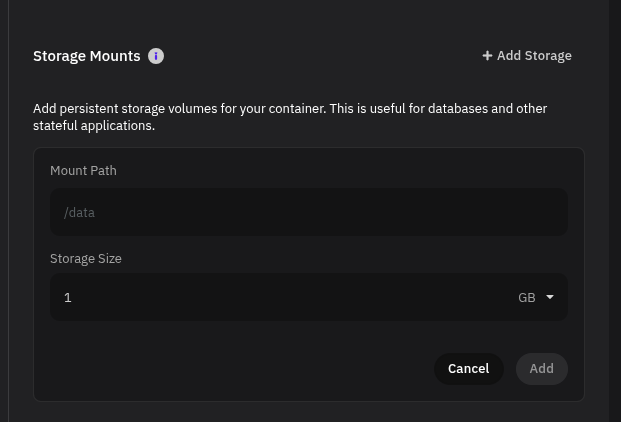
Storage Mounts: This is where you add persistent storage volumes for your container. This is useful for databases and other stateful applications but since this is a basic stateless application, we do not need to add mount any storage here
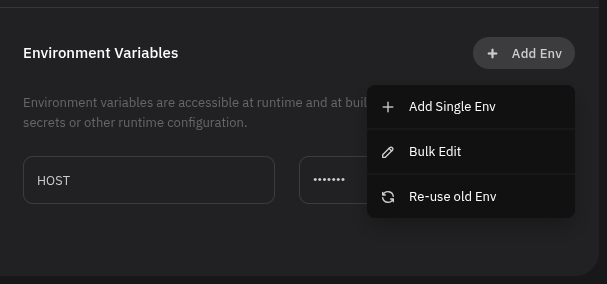
Environment Variables: If your application requires environment variables, add them under the Environment Variables section, you can add in bulk or single env.
The nginxdemos/hello image used in this guide doesn't require any environment variables, so you can proceed to the next step.
For other applications, you might configure variables such as:
| Variable | Example |
|---|---|
| PORT | 8080 |
| DATABASE_URL | Database connection string |
| API_KEY | Your API key |
Always avoid storing sensitive values directly in your Docker image.
Step 7: Review and Deploy
Review your deployment configuration, including:
- Selected Docker image
- Image tag
- Service configuration
- Environment variables
- Networking settings
If everything looks correct, click Deploy Project.
Step 8: Monitor the Deployment
PipeOps will begin pulling the selected Docker image from Docker Hub and deploying your application.
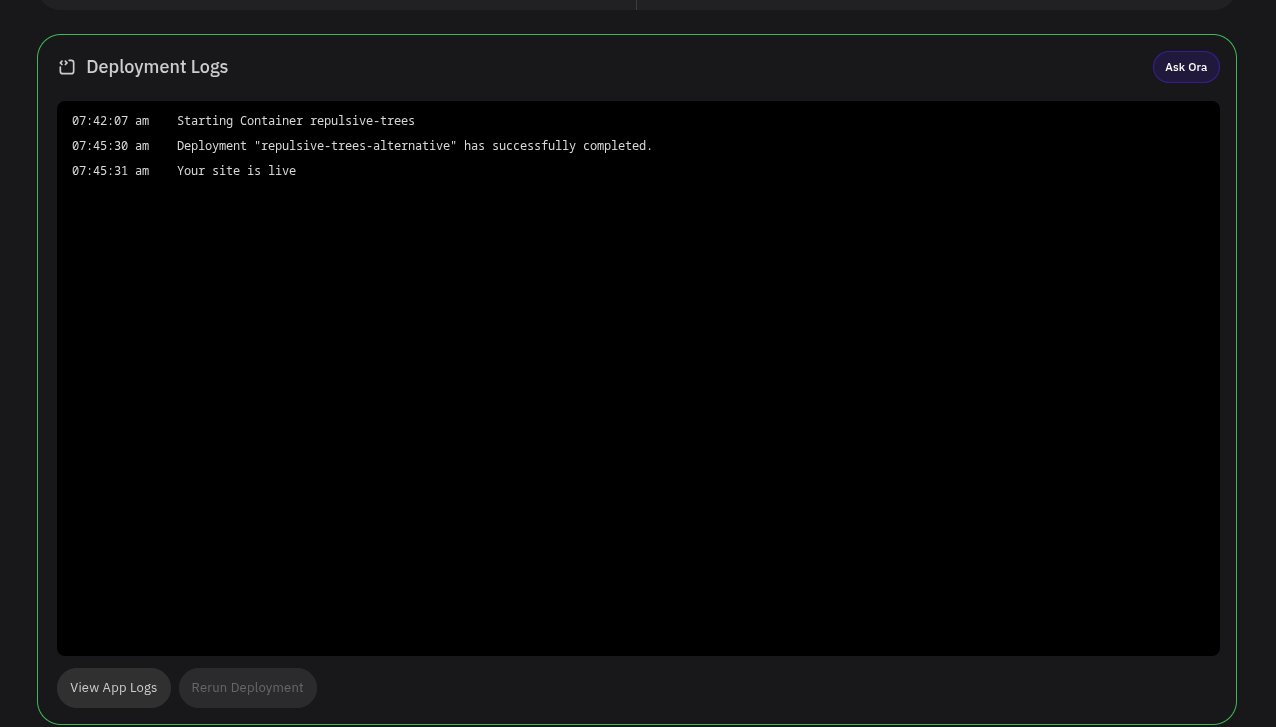
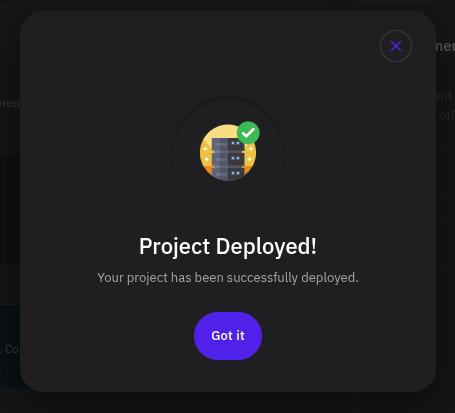
You can monitor the deployment progress from the deployment logs. Once the deployment completes successfully, a modal will pop up telling you your project has been deployed successfully.
Step 9: Access Your Application
After your deployment is complete, PipeOps generates a public URL for your application.
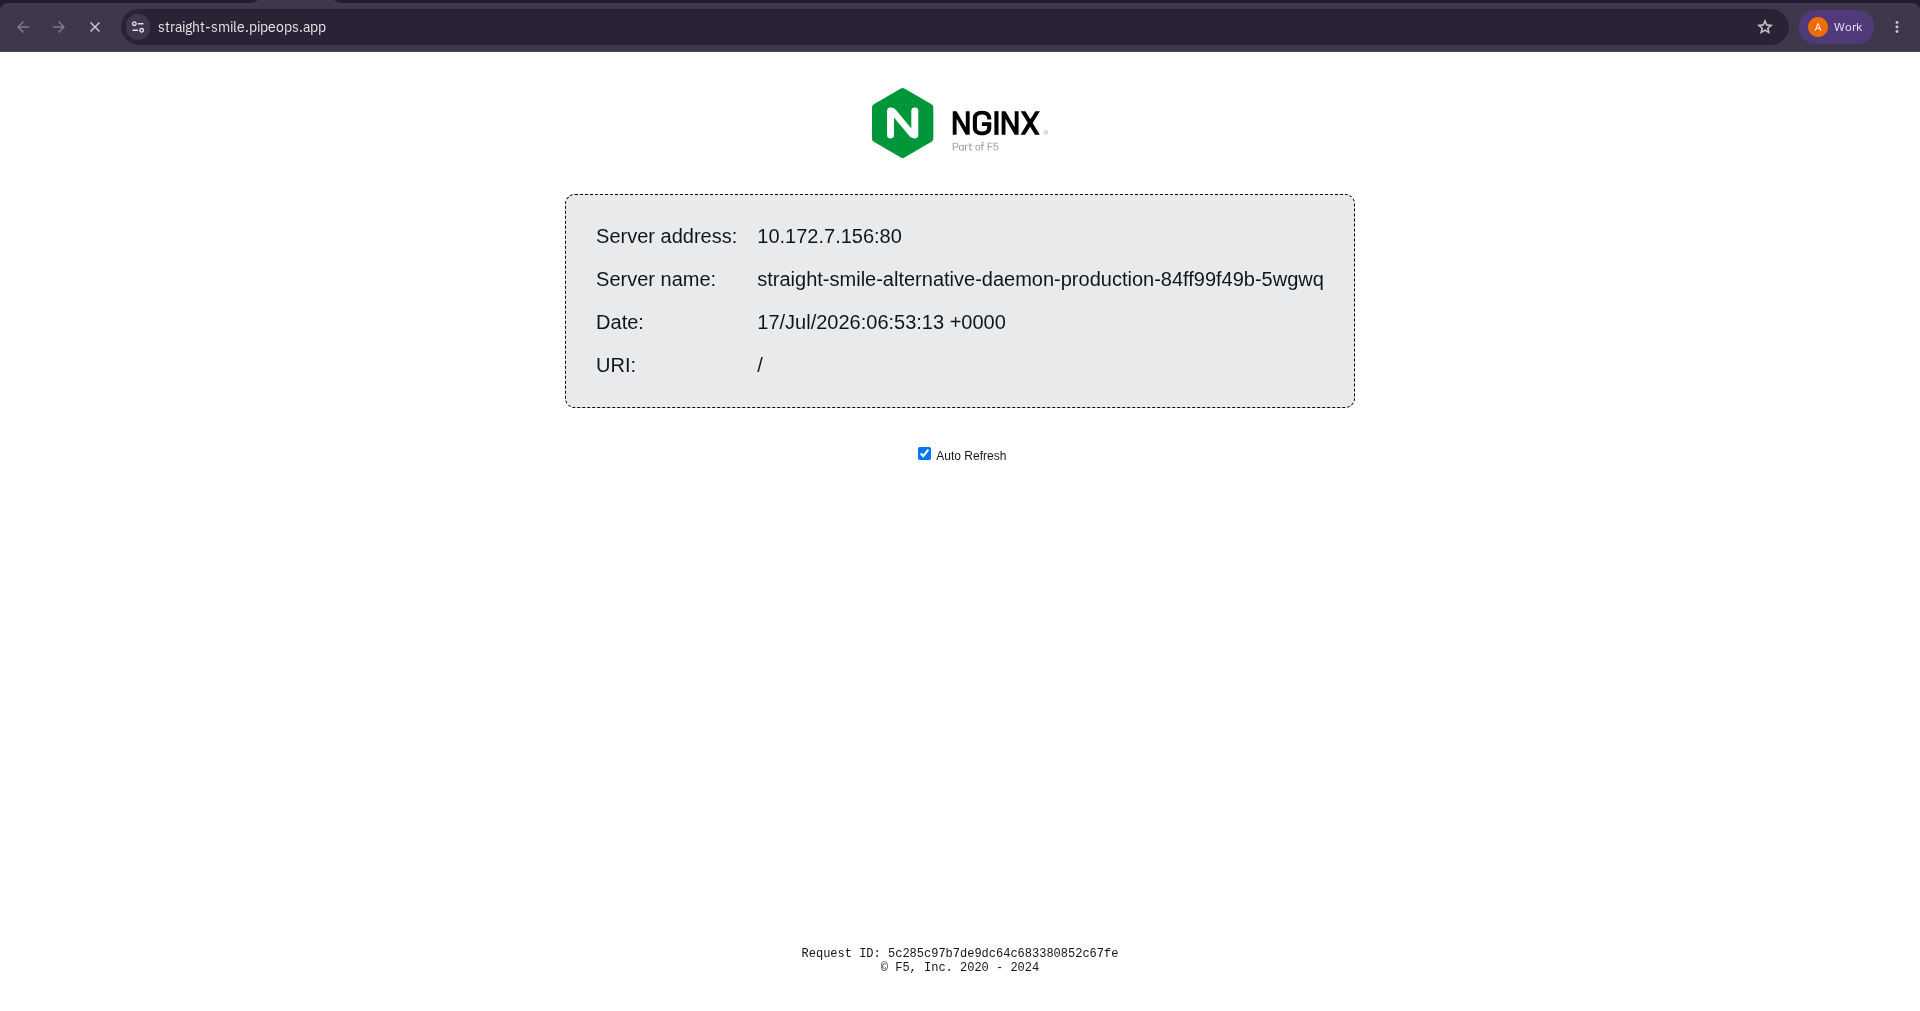
Open the URL in your browser. If you followed this guide using the nginxdemos/hello image, you should see the NGINX Hello page, confirming that your application has been deployed successfully.
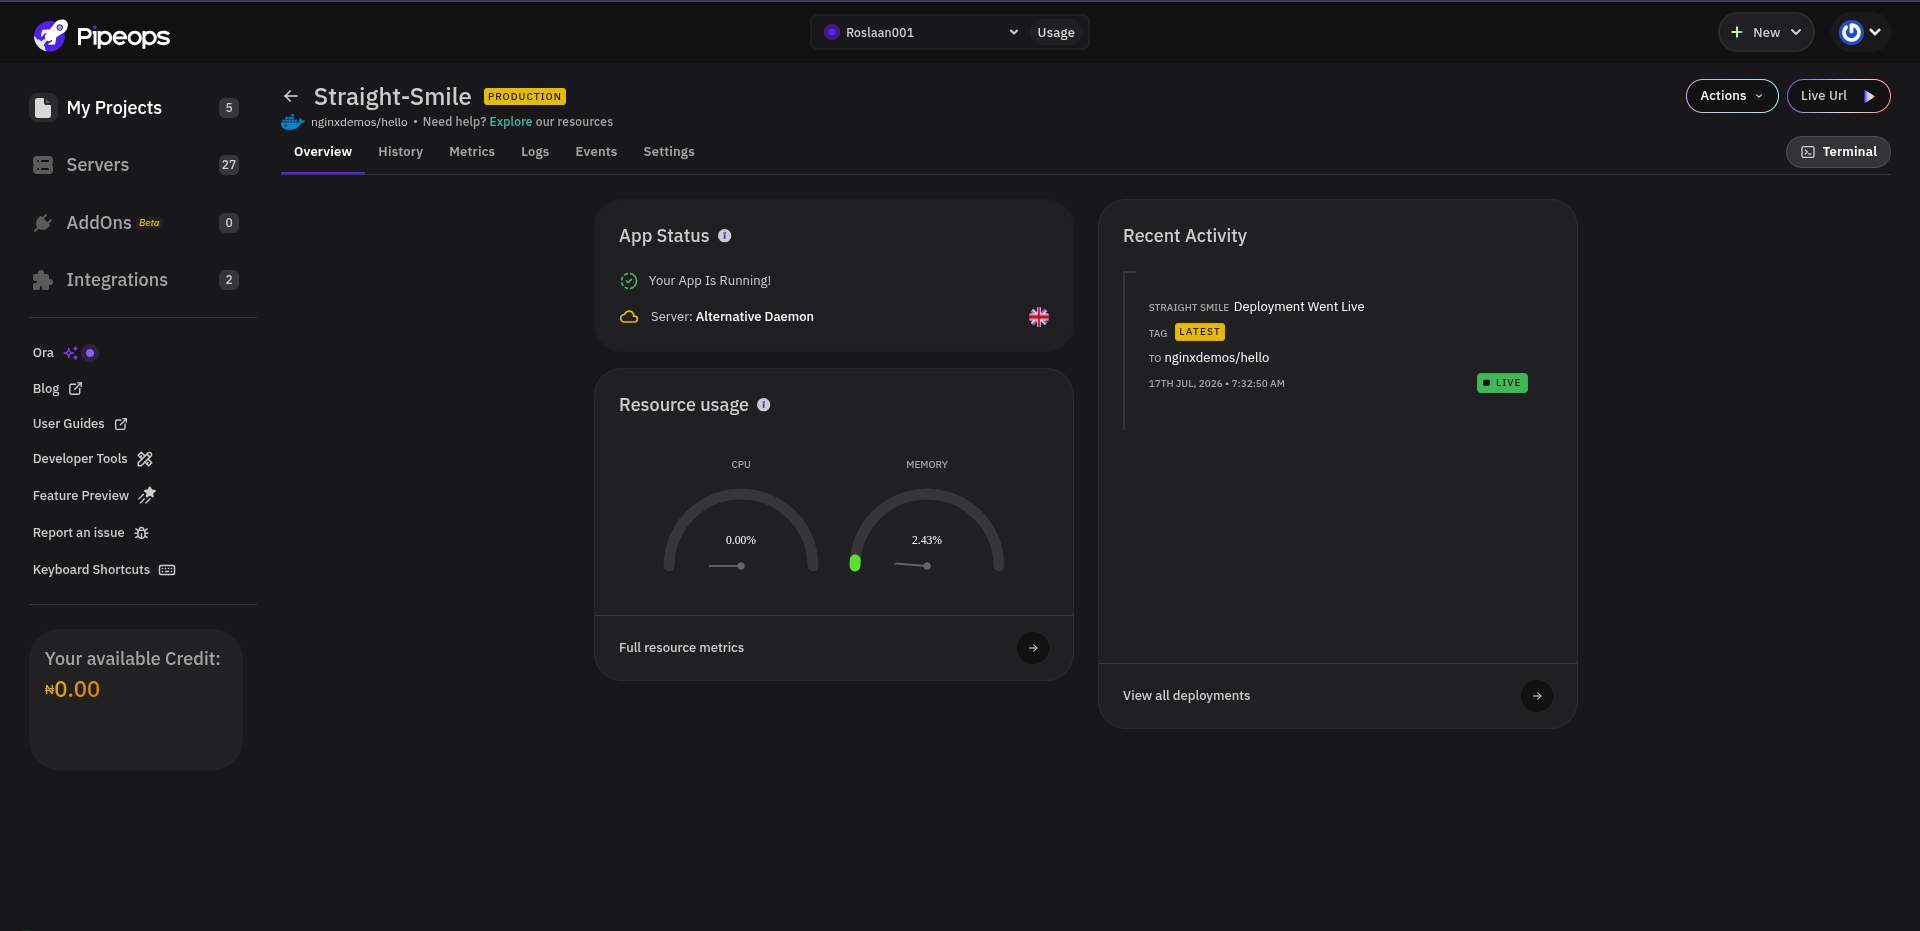
From the service dashboard, you can see:
- The deployment logs.
- Monitor resource usage.
- See Metrics and history
- Settings where you can configure your custom domain, scale your application, redeploy using a newer tag image etc.
- The events
click the Live URL at the top right to see the nginx hello demo image running
Troubleshooting
Image Not Found
- Verify that the image name is correct.
- Confirm that the selected tag exists.
- Ensure the image has been pushed to Docker Hub.
Unable to Access a Private Image
- Verify that you've signed in to the correct Docker Hub account.
- Confirm that the account has permission to access the repository.
- Reconnect your Docker Hub account if the authentication has expired.
Container Fails to Start
- Review the deployment logs for errors.
- Verify that the application is listening on the configured container port.
- Ensure all required environment variables have been configured.
Application Is Not Accessible
- Confirm that the correct port is exposed.
- Verify that the deployment completed successfully and you get a modal telling you your project has been deployed successfully
Next Steps
Congratulations! You've successfully deployed a Docker Hub image on PipeOps.
You can now continue by:
- Deploying applications from private Docker Hub repositories.
- Deploying images from Amazon ECR or GitHub Container Registry (GHCR).
- Configuring custom domains.
- Scaling your application.
- Monitoring your application's health and logs from the PipeOps dashboard.