Connecting Your Custom Domain to PipeOps
Custom domains make your application more professional and easier for users to remember. With PipeOps, connecting your domain is fast and secure.
This guide walks you through adding a domain and updating your DNS settings so your app is accessible via your own domain name.
Prerequisites
Before you begin, make sure:
-
You’ve deployed a project on PipeOps.
-
You own the domain you want to connect (e.g., via Namecheap, GoDaddy, etc.).
-
You can access your DNS provider’s dashboard to edit DNS records
For this guide, we’ve deployed a project that’s currently accessible via a pipeops.app endpoint.
Step 1: Go to Your Project Settings
-
Log in to your PipeOps Dashboard
-
Select the project you want to connect the domain to
-
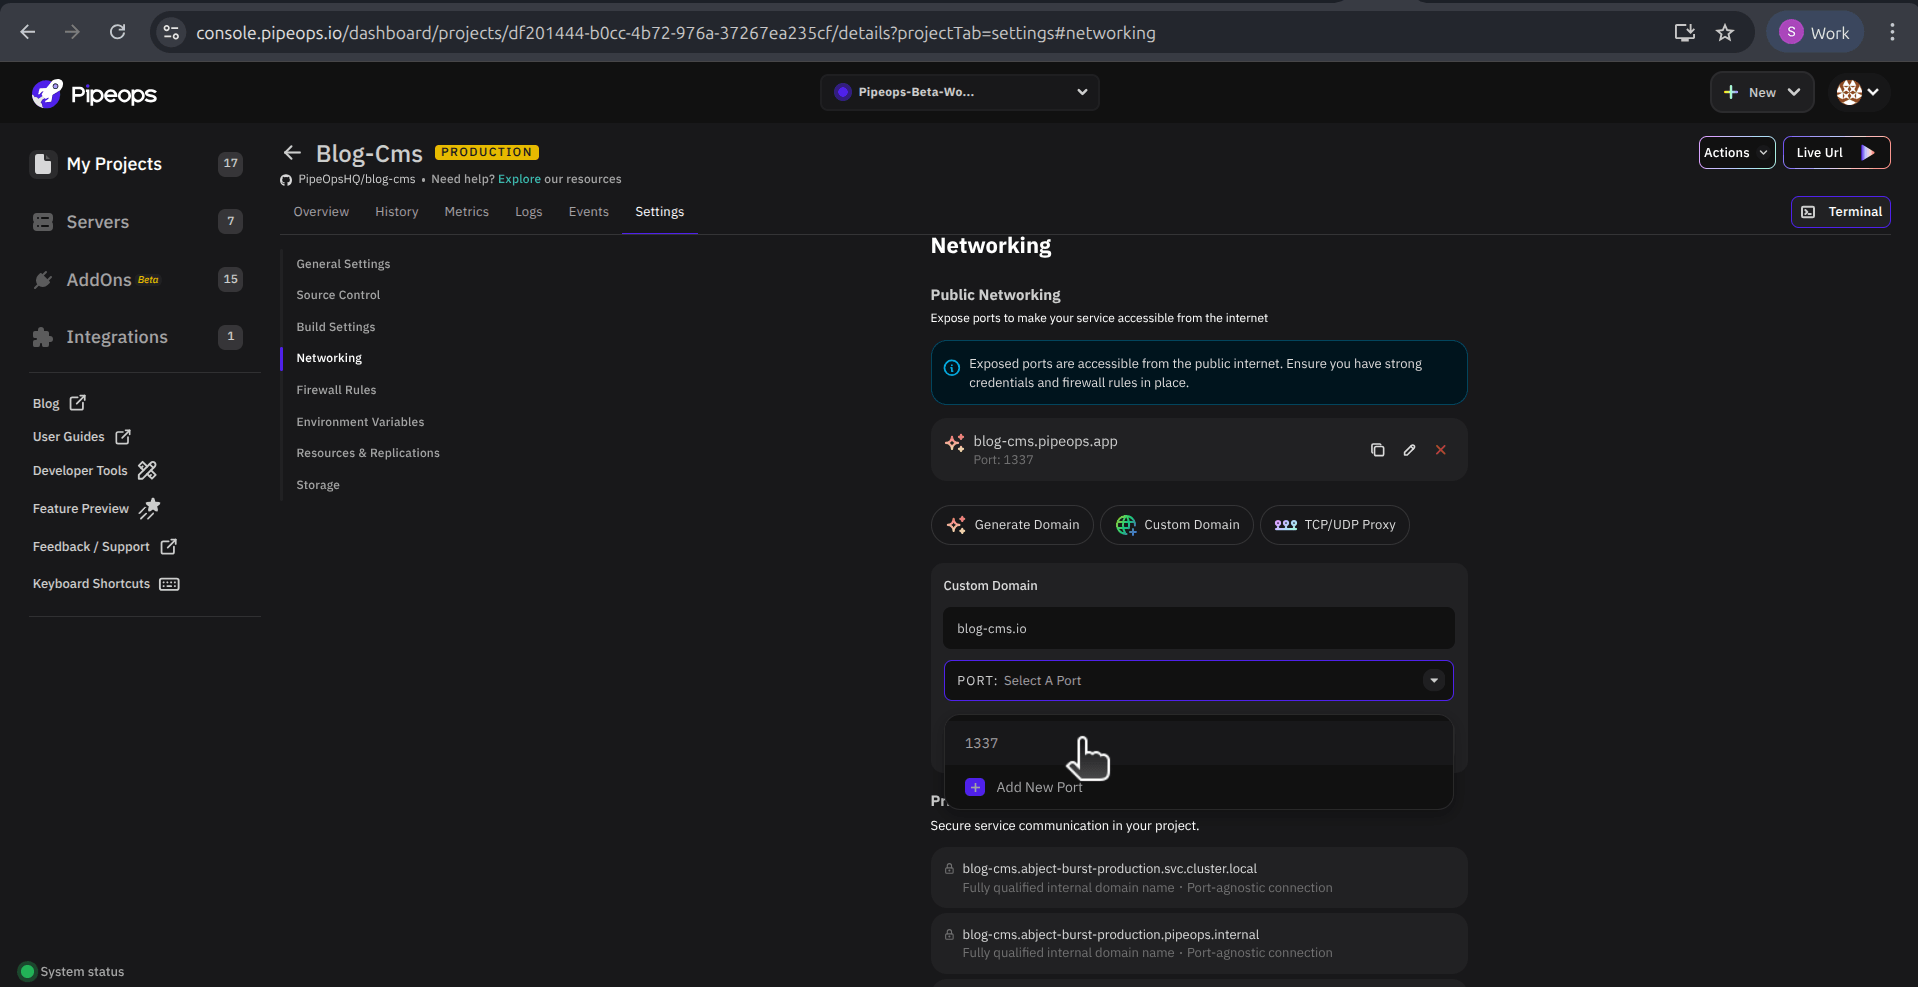
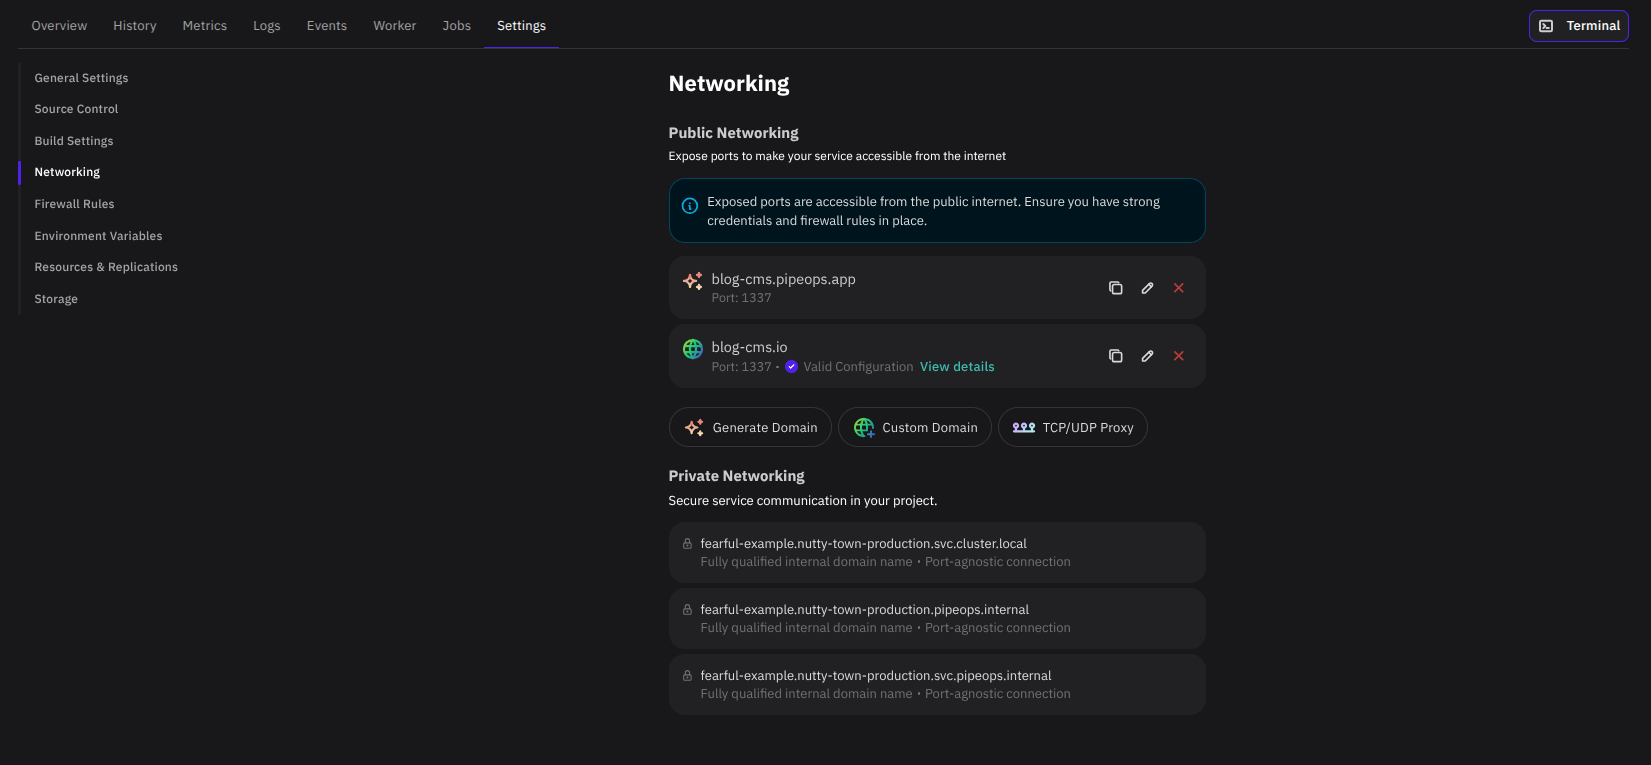
Navigate to Settings and select Networking from the left menu
-
Click on the Custom Domain option from the list of options displayed to you
-
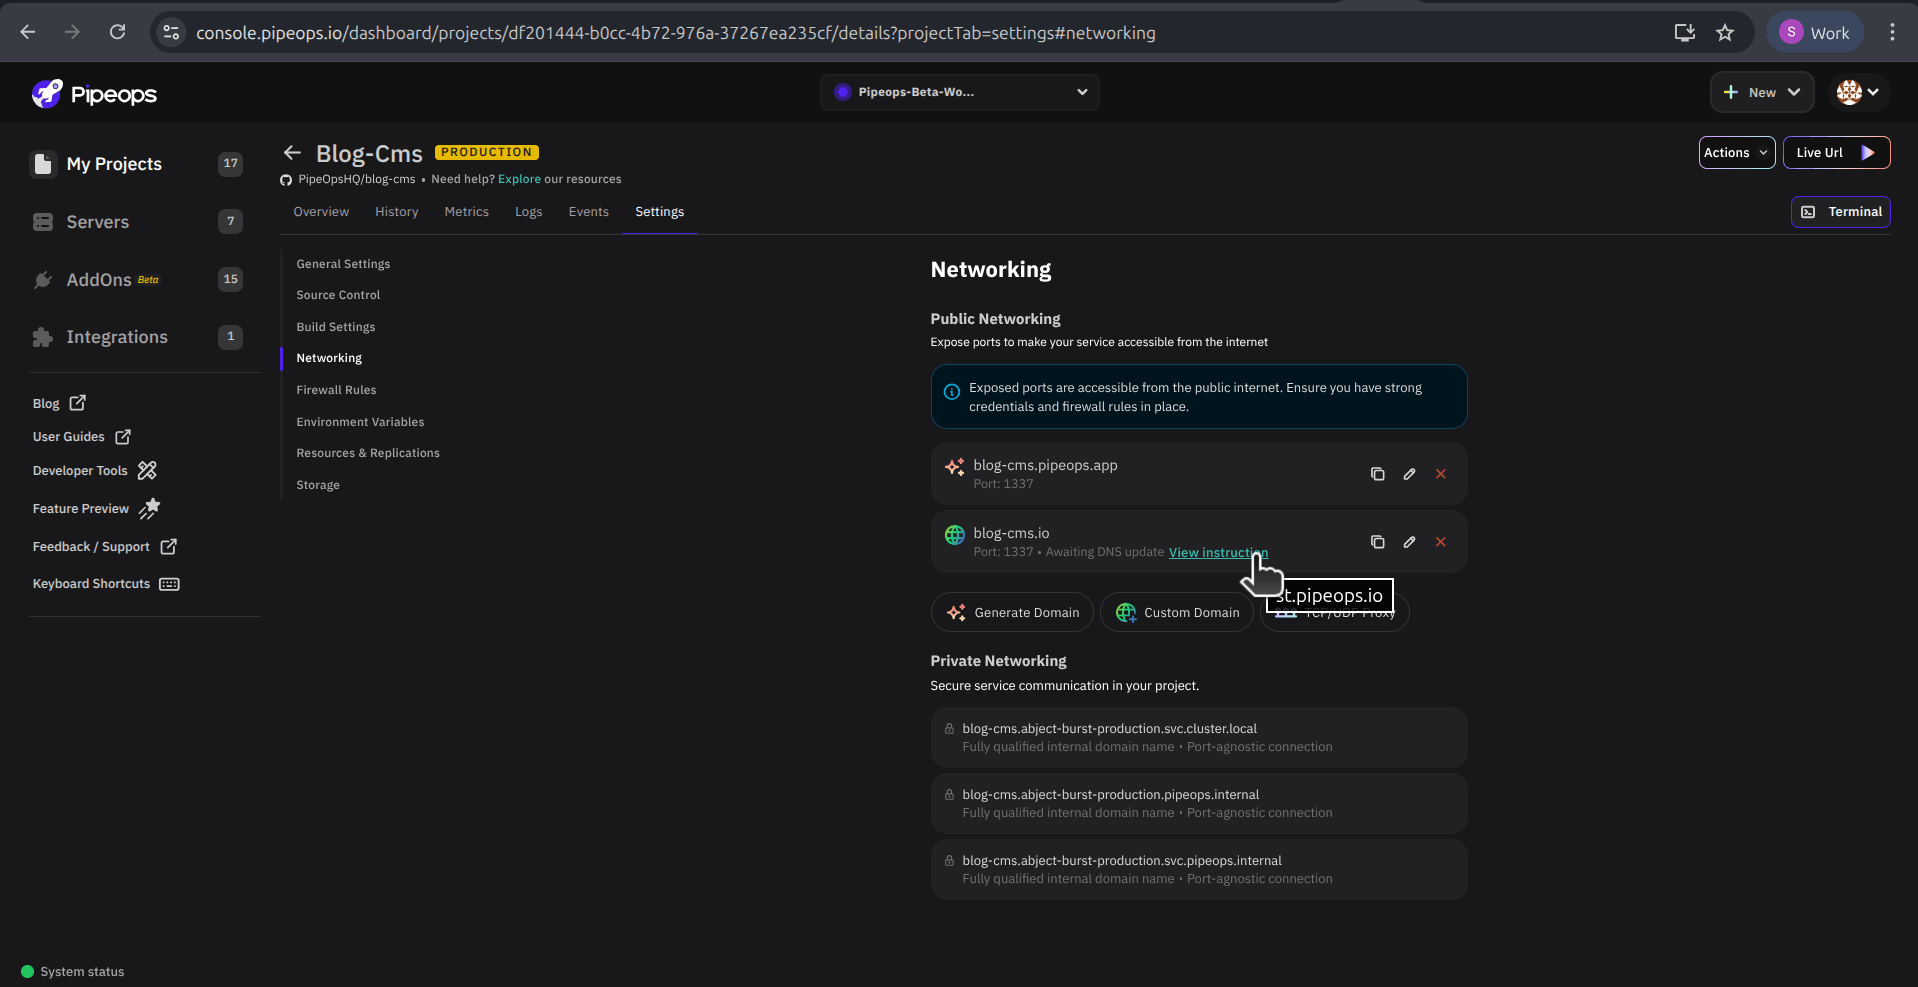
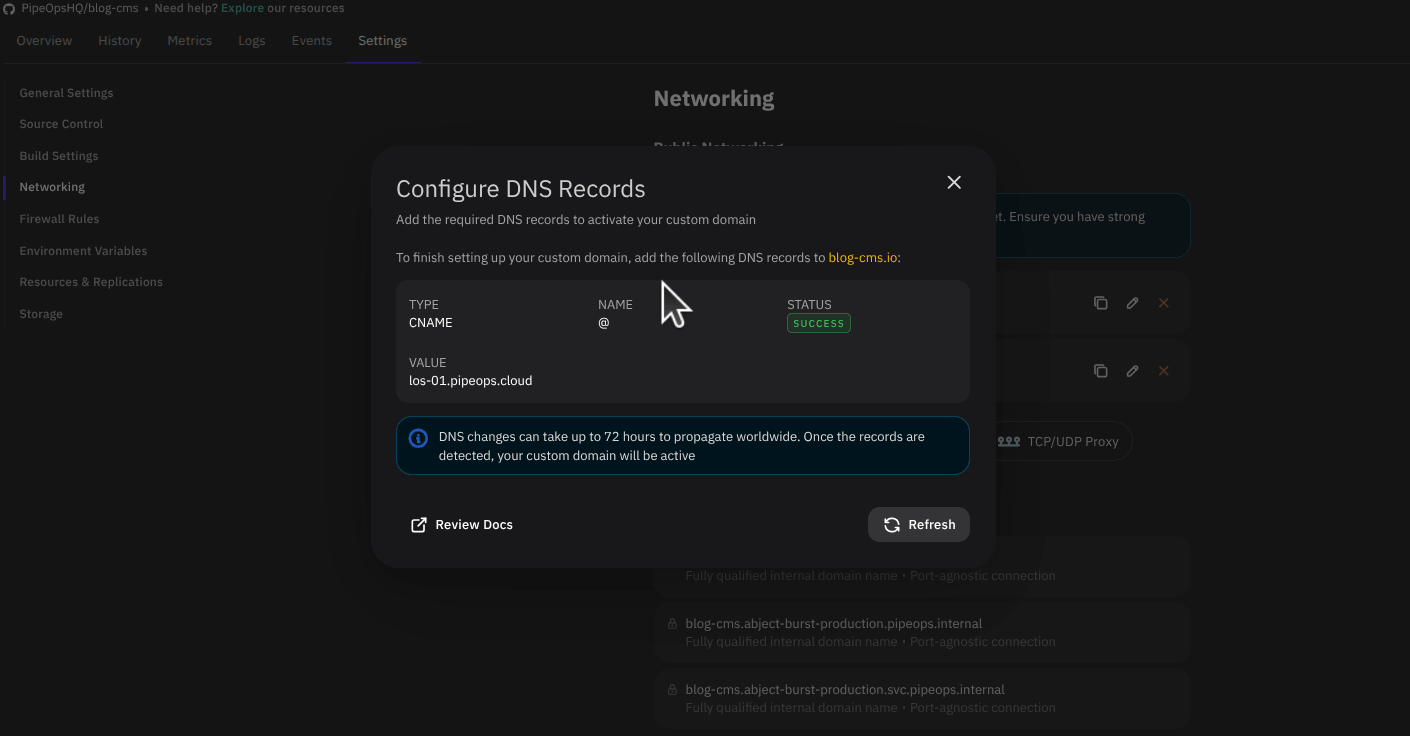
Enter the full domain name (e.g., mydomain.com) in the text field that appears, then select an existing port or add a new one to connect your domain.
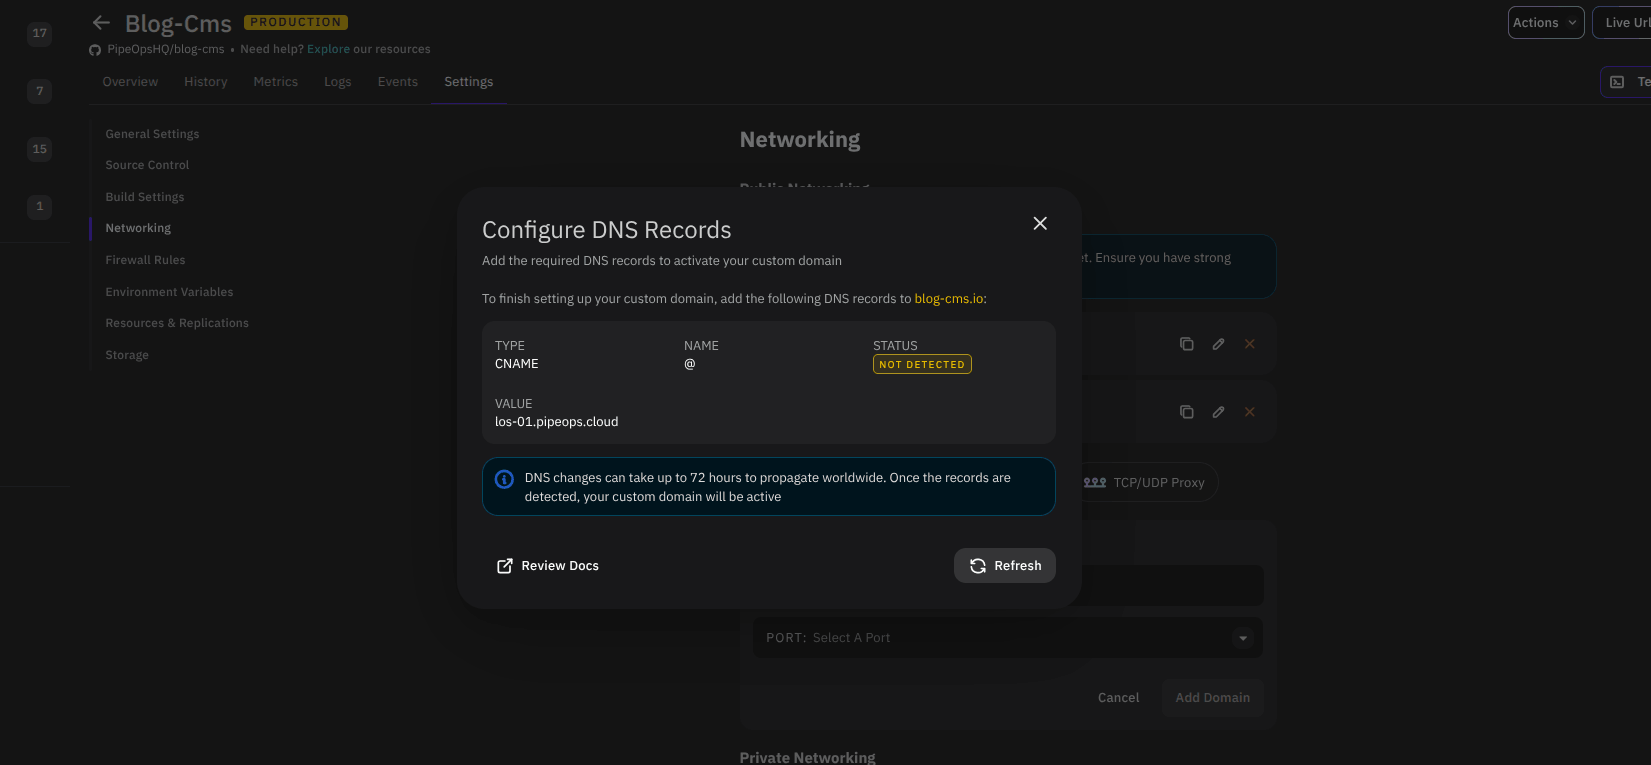
- Click Add Domain, and PipeOps will generate the DNS records you need to add to your domain registrar. You can access these records by clicking the View Instruction link.
When adding your PipeOps DNS records, it’s important to know that some domain providers, like GoDaddy, do not allow CNAME records at the root (apex) domain (e.g., yourdomain.com).
If you run into this limitation, don’t worry—you have a few reliable workarounds. Skip to **“Using GoDaddy or Providers That Don’t Support Root CNAME”**section for detailed solutions.
Standard Setup (If Your Provider Supports Root CNAME)
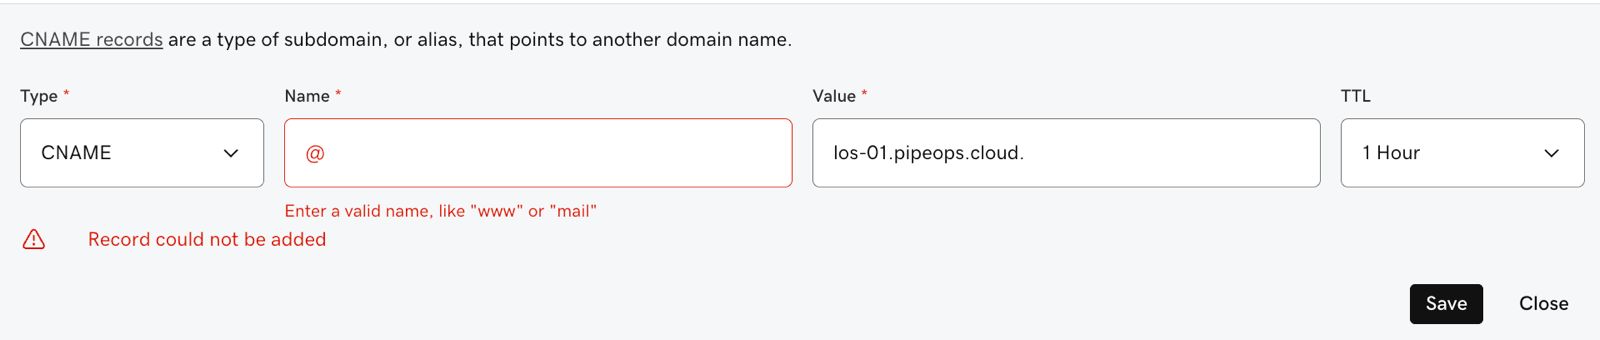
Add the PipeOps-provided CNAME record directly:
- Type: CNAME
- Name/Host: @
- Value/Target:
your-pipeops-dns-value - Save your changes.
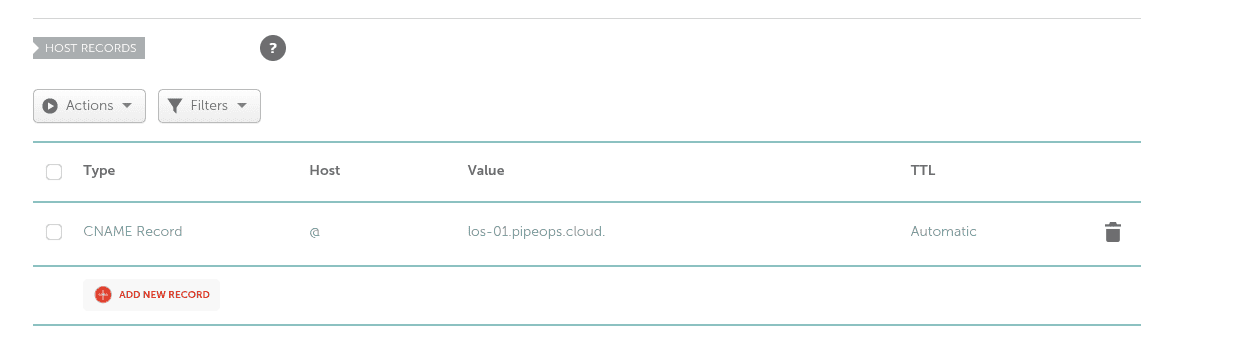
Once DNS propagates, your domain will point to your PipeOps app.
Using GoDaddy or Providers That Don’t Support Root CNAME
If your DNS provider (like GoDaddy) blocks CNAME records at the root domain, choose one of the options below:
Option 1. Cloudflare Nameservers (Recommended for Apex Domains)
This is the best approach if you want yourdomain.com (no www) to point to your PipeOps app. Cloudflare supports CNAME flattening, allowing root domains to behave like CNAMEs.
Your domain remains registered at GoDaddy—you’re only changing DNS management.
Step 1. Create a Free Cloudflare Account
-
Go to cloudflare.com and sign up.
-
Click Add a Site and enter your domain (e.g.,
yourdomain.com). -
Select the Free plan.
-
Cloudflare will import your existing GoDaddy DNS records automatically.
- Keep MX records (email).
- Remove any parked-page A records.
Step 2. Add Your PipeOps CNAME in Cloudflare
- Open the DNS panel → Add Record
- Type: CNAME
- Name: @
- Target: your PipeOps CNAME (e.g.,
your-pipeops-dns-value) - Set Proxy status to DNS only (grey cloud), unless you want CDN features
- Save
Step 3. Update GoDaddy Nameservers to Cloudflare
- In GoDaddy → My Products → DNS
- Scroll to Nameservers → Change
- Select Enter my own nameservers
- Replace with Cloudflare’s nameservers (e.g.,
aria.ns.cloudflare.com,ben.ns.cloudflare.com) - Save changes
Note: Propagation typically takes a few minutes to 72 hours.
Option 2. Subdomain CNAME in GoDaddy (Simplest)
If you’re okay using www.yourdomain.com, this avoids all root-domain issues.
Step 1. Add the CNAME in GoDaddy
- Go to My Products → DNS
- Click Add New Record
- Type: CNAME
- Name/Host: www
- Value: your PipeOps CNAME (e.g.,
your-pipeops-dns-value) - TTL: 1 Hour
- Save
Step 2. Redirect Root Domain to www
-
In DNS Management → Forwarding
-
Add forwarding:
- Forward
yourdomain.com→https://www.yourdomain.com - Type: 301 (Permanent)
- Forward
-
Save
Option 3 — A Record at the Root Domain (Last Resort)
Warning: Use only if you cannot use Cloudflare or a subdomain.
A records point to fixed IPs, which may break if infrastructure changes.
-
Add a new record:
- Type: A
- Name: @
- Value:
your-pipeops-server-ipLocate your server IP in PipeOps by navigating to your server list page and selecting the server you want to get the IP for. Once the server details page loads, you'll see your IP as shown in the image below. Copy it, return to your DNS provider page to continue adding your DNS record.
- TTL: 1 Hour
-
Remove any existing
@A records pointing to parked pages
-
Save
Wait for DNS Validation
After saving your DNS records, the system will automatically detect the new records and validate the domain. You can confirm this by checking your dashboard, where the status will appear as shown in the images below.
It can take a few minutes to a few hours for your DNS records to propagate.
Summary
-
If your DNS provider supports root CNAME: Add the PipeOps CNAME directly to
@for a straightforward setup. -
If your provider does not support root CNAME (e.g., GoDaddy):
- Best option: Use Cloudflare to enable CNAME flattening and connect your root domain (
yourdomain.com). - Simplest option: Use a
wwwsubdomain with a CNAME and redirect the root domain to it.
- Best option: Use Cloudflare to enable CNAME flattening and connect your root domain (
-
Last resort: Use an A record pointing to your server IP (less reliable and may break if infrastructure changes).
-
After setup: DNS changes may take a few minutes to a few hours (sometimes up to 72 hours) to fully propagate.